The Defender Indicators Page Nobody Opens (But Every SOC Should)
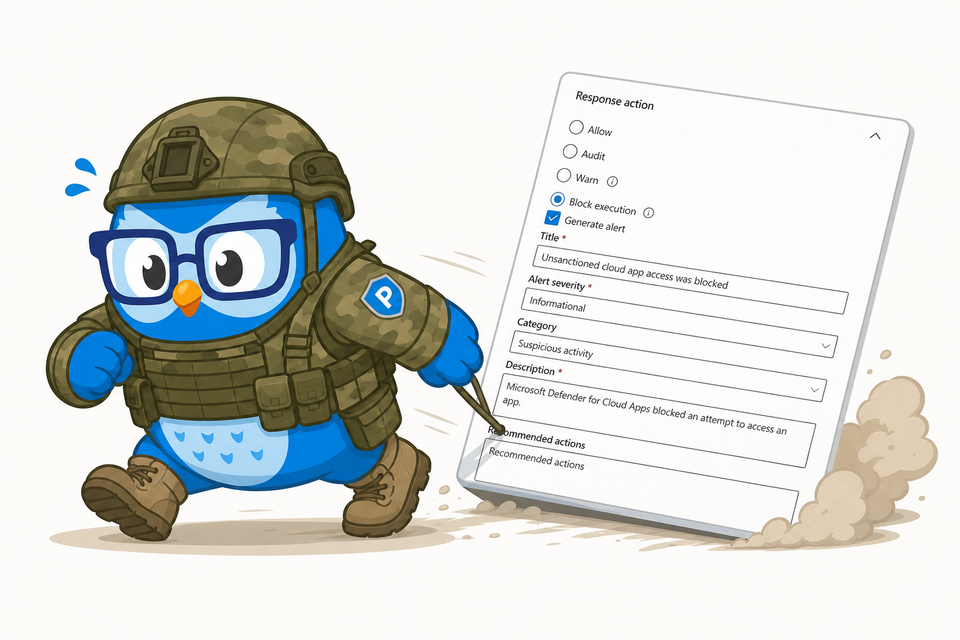
All right class.
There is a page in the Defender portal you have almost certainly never opened. It sits at Settings > Endpoints > Indicators, tucked under Rules, and most people scroll straight past it. That is a shame, because it quietly does one of the most useful jobs in the whole platform. It lets you take any domain, URL, IP address, file hash, or certificate and decide exactly what happens when a managed device touches it. Allow it. Warn on it. Block it. Or the bit almost nobody uses: raise an alert on it.
And here is what makes it properly interesting for a SOC. It is the same engine Defender for Cloud Apps uses under the hood. Wire the two together and your shadow IT decisions start enforcing themselves. Leave them apart and, well, we will get to that.
Let's go through it.
Where It Lives And What It Actually Does
Open the Defender portal and go to Settings > Endpoints > Indicators. You get four tabs: File hashes, IP addresses, URLs/Domains, and Certificates. This post is about URLs/Domains, but everything here applies across the board.
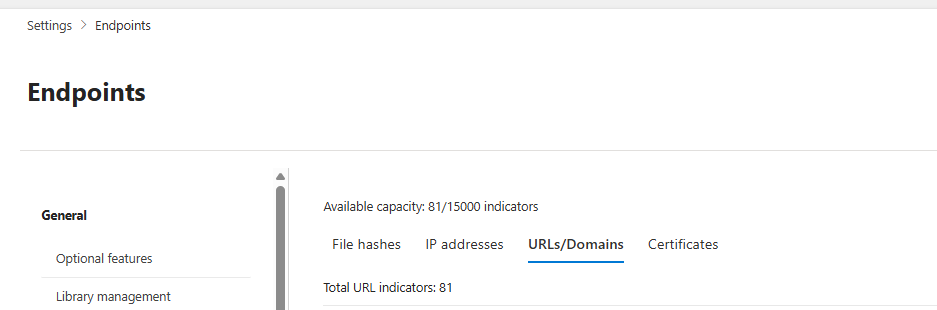
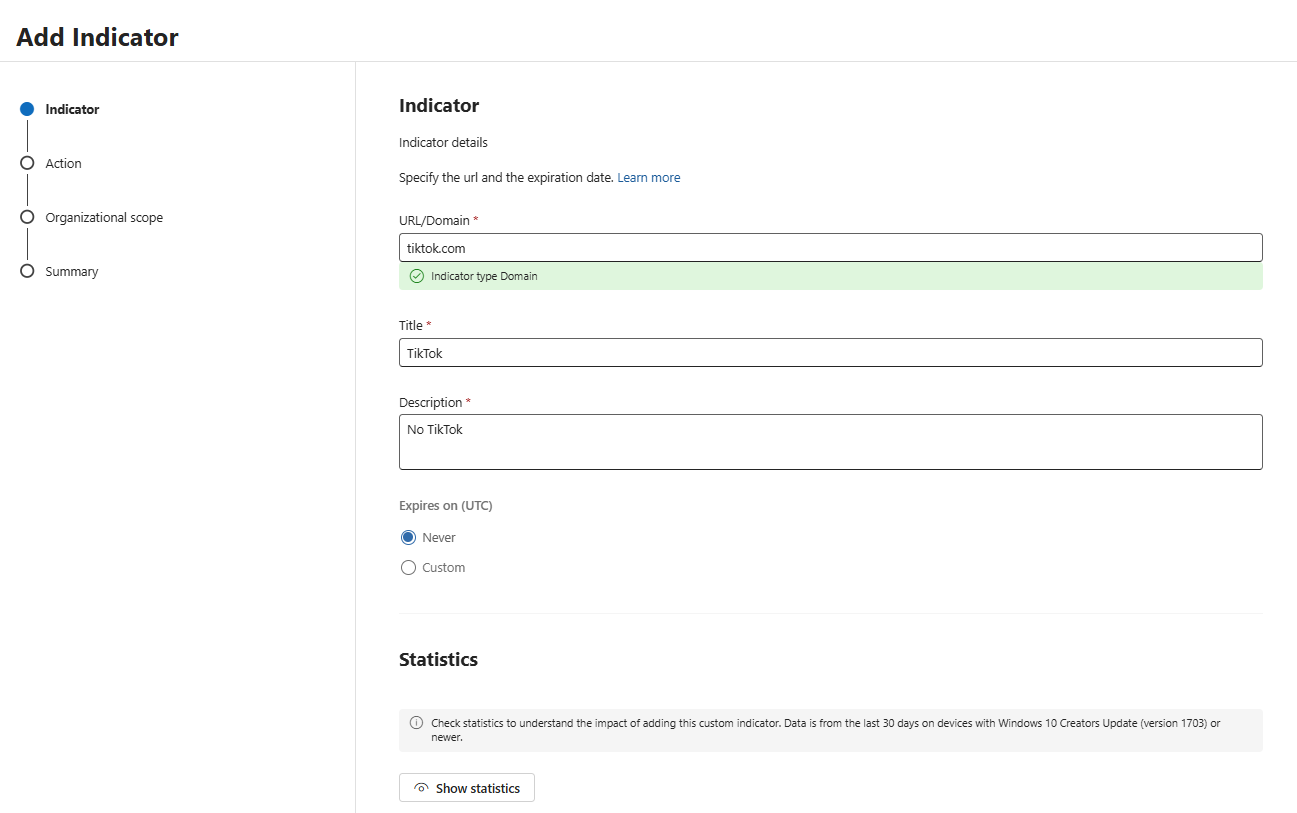
Hit Add item, type in a domain, and you are asked two things: how long the indicator should live, and what action to take. Set an expiry or leave it as Never (more on why Never is usually a mistake later). Then pick your action. This is where the page earns its keep.
The Four Actions, In Plain English
You get four choices, and they do exactly what they say:
- Allow. The domain is explicitly permitted. Defender leaves it alone and raises nothing. Use this to un-break a legitimate site that Microsoft's own threat intelligence, or your own web filtering, has wrongly flagged.
- Audit. The domain is allowed through, but every time a device hits it you get an alert. Nothing is blocked. Think of it as a tripwire. This is the sleeper feature and we will come back to it.
- Warn. A soft block. The user sees a prompt telling them the site is risky, and they can click through and carry on if they want. Good for the "we would rather you did not, but we are not going to physically stop you" apps.
- Block execution. A hard stop. The connection does not happen.
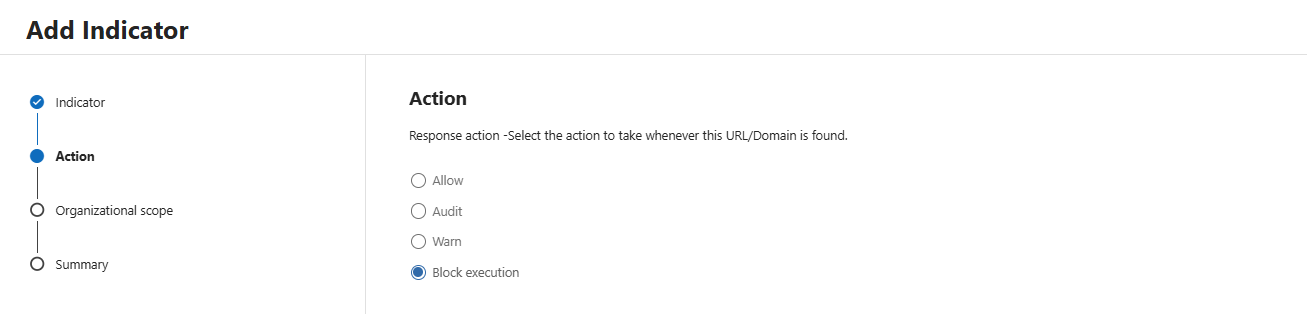
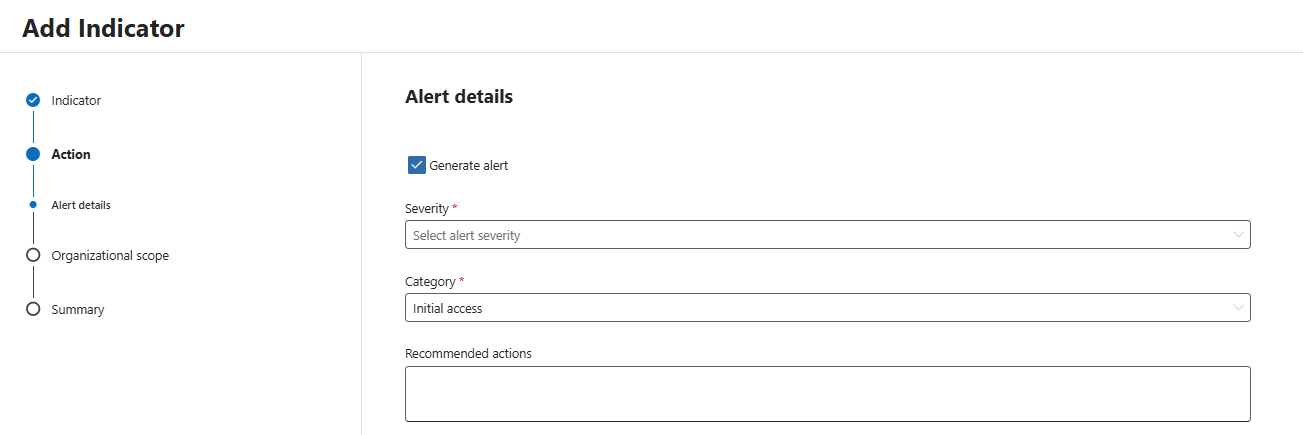
Underneath the action there is a tick box: Generate alert. That little box is the thing this whole post is about, and it behaves differently depending on which action you picked.
The Alert Bit Everyone Misses
Here is what actually happens when you tick Generate alert, because it is not consistent and it trips people up:
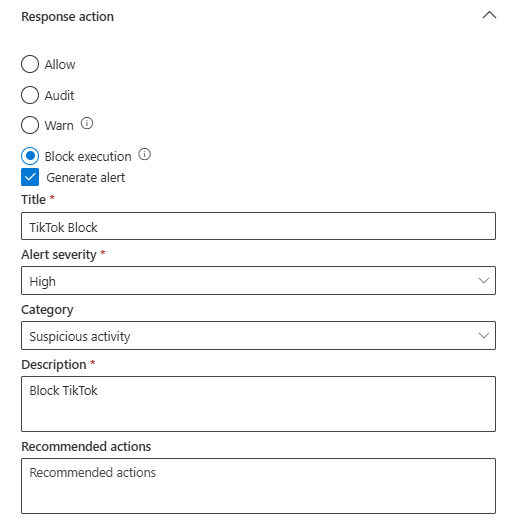
- Audit respects the title, severity, and category you type in. This is the only action where your custom alert comes through exactly as you designed it. Set it to High, call it whatever you like, and that is what lands in your queue.
- Block and Warn only ever fire a generic Informational alert. It does not matter what you type in the title or severity boxes. The UI happily lets you fill them in, but for these two actions Defender ignores them and drops a plain informational alert instead.
- Allow stays silent by design.
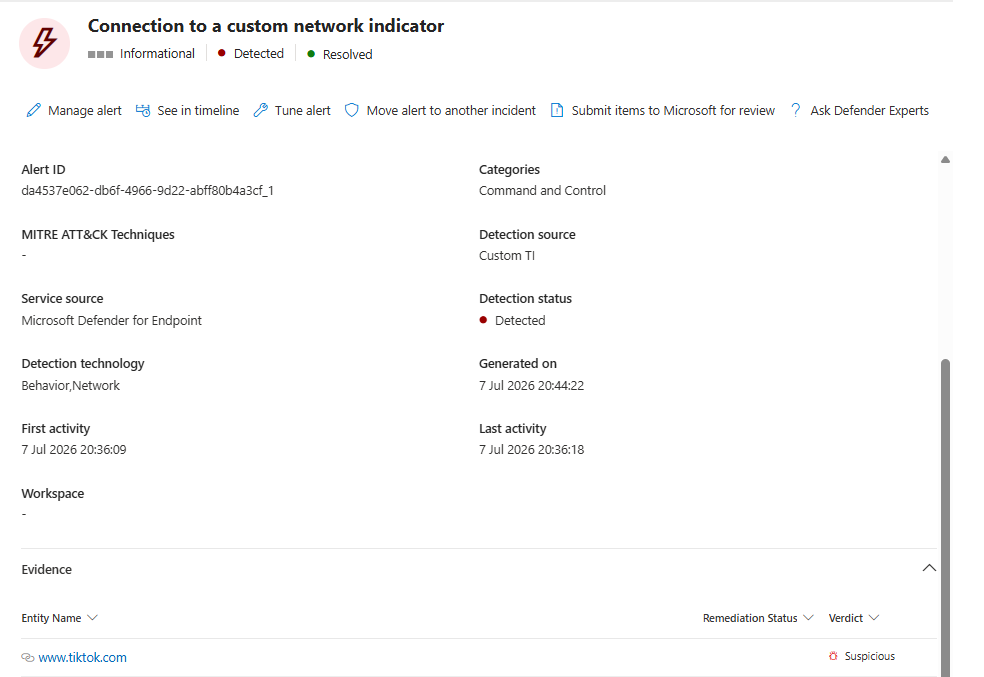
Why does this matter? Because that alert flows straight into your incident queue, and from there into Sentinel if you have the connector running. So an Audit indicator with Generate alert ticked is, in effect, a free custom detection. You have just turned "someone on a managed device touched this domain" into an alert, without blocking anything and without writing a single line of KQL.
That is useful during an incident. You have a domain you are suspicious of but not ready to hard block. Audit it, alert on it, and watch who reaches for it. You get the visibility without the helpdesk tickets that a hard block would generate.
Where It Gets Good: The Cloud Apps Link
Now the part that most people never connect.
This indicators page is the exact same mechanism Defender for Cloud Apps uses to enforce app blocking. If you have the licence and you have turned the integration on, every app you tag in Cloud Discovery writes indicators straight into this list, automatically:

- Tag an app Unsanctioned and Cloud Apps creates Block indicators for every domain that app uses.
- Tag an app Monitored and it creates Warn indicators instead, so users get the bypassable prompt (no it's not Audit as some may think)
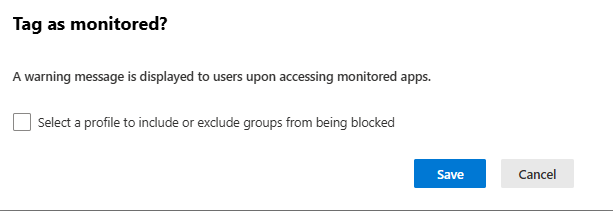
- Tag an app Sanctioned and nothing is created. There is no automatic Allow indicator. Sanctioning just means "leave it alone".
You do not touch the indicators page at all. You make a governance decision in Cloud Apps and the enforcement appears here on its own, usually within a few minutes (up to a few hours though in some cases) then propagates out to your devices.
I covered the wider Cloud Apps settings in
 Bartosz Wysocki
so I will not repeat all of it. But there is one setting that decides whether any of this works, and it deserves its own section.
The One Setting That Makes It Work, Or Does Absolutely Nothing
Go to Settings > Cloud Apps > Microsoft Defender for Endpoint and find Enforce app access.

If that box is unticked, here is what happens when you mark an app Unsanctioned: nothing. No indicators get created. Nothing gets blocked. Your Unsanctioned label is a sticker. You can tag fifty apps, pat yourself on the back, and not a single one of them is blocked on a single device.
Turn Enforce app access on and the whole thing comes alive. Unsanctioned and Monitored tags start writing their indicators (yes - even those old ones will get populated automatically), the domains flow down to your endpoints, and the blocks and warnings actually land.
A few things need to be true for enforcement to bite:
- Network protection in Block mode on your endpoints. This is what does the blocking for non-Microsoft browsers and non-browser traffic. SmartScreen handles Edge.
- Cloud-delivered protection on.
- Custom network indicators and the Defender for Cloud Apps integration, both switched on under
Settings > Endpoints > Optional features.
I wrote about those optional-feature toggles in
 Bartosz Wysocki
If you have not been through them, start there, because they are the foundation for everything above.
One caveat worth knowing: HTTPS sites in third-party browsers will not be blocked unless network protection is doing the work, and propagation is not instant. Budget a couple of hours between tagging an app and seeing the block land on devices. Sometimes longer. Test, then wait, then test again.
Great For Audit. Painful For Incidents.
Now the honest bit, and this is where I part company with the default configuration.
When Cloud Apps auto-creates those Block indicators, it also generates an alert on every single blocked access attempt. Fine in theory. In practice, block a genuinely popular app (ChatGPT is the classic, WhatsApp is another) and every user who bumps into that block on every device throws an Informational alert. Multiply that by your fleet and you are looking at hundreds of identical informational alerts a day, all telling you the same thing you already know: the thing you blocked is blocked.
Now, for years now it was impossible not to create those alerts in any easy way other than manually going to each indicator and removing the "Generate Alert" tick box.

The Fix Microsoft Finally Shipped
They have now, at long last, given us a switch.
On that same Settings > Cloud Apps > Microsoft Defender for Endpoint page there is a toggle: Generate alert for blocked app access. Turn it off.
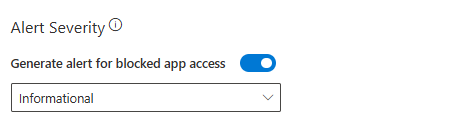
Enforcement carries on exactly as before. The block still blocks. Users still get stopped. You simply stop generating an Informational alert every time it happens.
My advice? Turn it off. Here is the reasoning. A block is not an incident. If an app is blocked and the block worked, the control did its job, and there is nothing for an analyst to do about it. Flooding the queue with "we blocked the thing we told it to block" is not security, it is noise, and noise buries the alerts that actually matter.
The one exception: if you have a compliance reason to keep an incident-queue audit trail of block events, and you have automation set up to handle the volume, leave it on. Otherwise, off.
Do Not Forget The Manual Side
Everything above is the automatic Cloud Apps path. The manual indicators page is still worth your time in its own right, and this is the stuff people forget it can do:
- Kill a phishing domain mid-incident. You have a live phishing campaign and a domain to burn. Add a Block indicator and it is enforced across every managed device in minutes. No change ticket, no waiting on the firewall or DNS team. This alone justifies knowing the page exists.
- Un-break a falsely blocked site. A business-critical site is caught by Microsoft's intelligence or your own web filtering. An Allow indicator takes precedence over the block and gets people working again.
- Warn on risky-but-tolerated apps. Not everything deserves a hard block. Warn lets people through with their eyes open, and logs it.
- Build a tripwire. As above, Audit plus Generate alert turns any domain into a detection that flows into Sentinel.
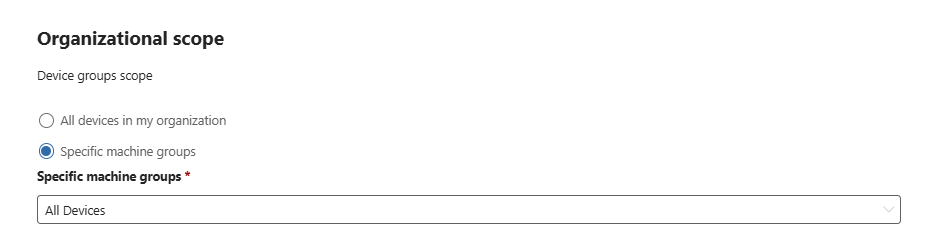
And scope it sensibly. You can apply an indicator to specific device groups rather than the whole tenant. If you are blocking something you have not fully tested, roll it out to a pilot group first. A tenant-wide block on a domain you got slightly wrong is a very public way to break everyone's morning.
Housekeeping So It Does Not Rot
Two more things, then you can go.
First, expiry dates. This is why Never is usually the wrong choice. Phishing domains are short-lived, incident-specific blocks stop being relevant, temporary allows outlive their reason. Set an expiry so old decisions clean themselves up. An indicators list nobody prunes turns into a graveyard of forgotten rules that nobody dares touch.
Second, a gotcha that catches every analyst once. When network protection blocks a site, you will still see a ConnectionSuccess action in the network events, because the block happens after the TCP handshake completes, not before. The site was blocked. The event just looks like it connected. Do not chase it as a failed block, it is working as designed.
Two smaller limits while you are here: no wildcards, it must be the exact domain or URL, and CIDR notation is not supported for IP addresses, so no whole-subnet blocks from this page.
Your Next Steps
Step 1. Open Settings > Endpoints > Indicators and just look at what is already in there. If you have Cloud Apps enforcement on, you will probably find indicators you did not know existed.
Step 2. Confirm you have network protection in Block mode, cloud protection on, and both custom network indicators and the Cloud Apps integration enabled (it's a mix settings between the Antivirus policy + Optional Features in Defender)

Step 3. Check Settings > Cloud Apps > Microsoft Defender for Endpoint and confirm Enforce app access is on. If it is off and you have apps tagged Unsanctioned, you have been blocking nothing.
Step 4. On that same page, turn off Generate alert for blocked app access unless you have a specific reason to keep it. Watch your Informational alert volume drop.
Step 5. Pick one suspicious (suspicious not malicious! that should be blocked straight away) domain from a recent incident and create an Audit indicator with Generate alert ticked. You now have a custom tripwire that lands in your queue and flows into Sentinel.
Step 6. Set expiry dates on any incident-specific block indicators you already have, and diarise a monthly tidy-up.
This page has been sitting in your portal the whole time, doing more than you realised and generating noise you did not have to put up with. Now you know where the switches are.
Class dismissed.