Herding Cats with Sentinel: An In-Depth Guide to Workspace Manager

Alright, class.
In a previous lesson, we discussed the "Seven Deadly Sins" of a Sentinel deployment, and Sin #1 was "Workspace Sprawl." I told you, with the fury of a thousand suns, that for a single organization, you should have one workspace to rule them all.
And I stand by that.
But then, reality walks in and slaps you in the face. You're an MSSP managing a dozen different clients. Your company just acquired another business, and you've inherited their entire Azure environment. Or maybe you're a global conglomerate bound by the sacred, unyielding laws of data residency.
Suddenly, you're not a security analyst anymore. You're a professional plate-spinner, trying to keep ten different Sentinel instances updated with the same analytic rules, the same workbooks, and the same hunting queries. It's a manual, and a dangerously error prone nightmare.
This, class, is the exact problem that Microsoft Sentinel Workspace Manager was built to solve. It’s your command-and-control centre for managing Sentinel content at scale.
What Is This Thing, and How Do I Turn It On?
Workspace Manager lets you designate one Sentinel workspace as your "central" workspace. From this single command post, you can create, test, and then "publish" your security content, like analytic rules, workbooks, and hunting queries, out to all your other "member" workspaces.
But before you can start conducting this symphony, you need to pick up the conductor's baton.
The Prerequisites: Your Pre-Flight Checklist
- The Obvious: You need at least two Sentinel workspaces. One to be your central command post, and at least one other to be managed.
- The Keys to the Kingdom: You need the Microsoft Sentinel Contributor role on your central workspace and on every member workspace you intend to manage. You can't command an army if you're not allowed in their barracks.
- The Inter-Dimensional Portal (for MSSPs): If you're managing workspaces across different Azure AD tenants (i.e., for different clients), you absolutely must have Azure Lighthouse set up. This is the magic that lets you securely see and manage your clients' workspaces as if they were your own.
Enabling Workspace Manager: The "Big Switch"
- Choose your champion. Decide which of your Sentinel workspaces will be the central one. This is where you'll build and stage all your content.
- Navigate to your central Sentinel in Azure.
- On the left menu, under Configuration, click Settings
- You'll see
Workspace manager configuration. Check the box that says Make this workspace a central workspace.
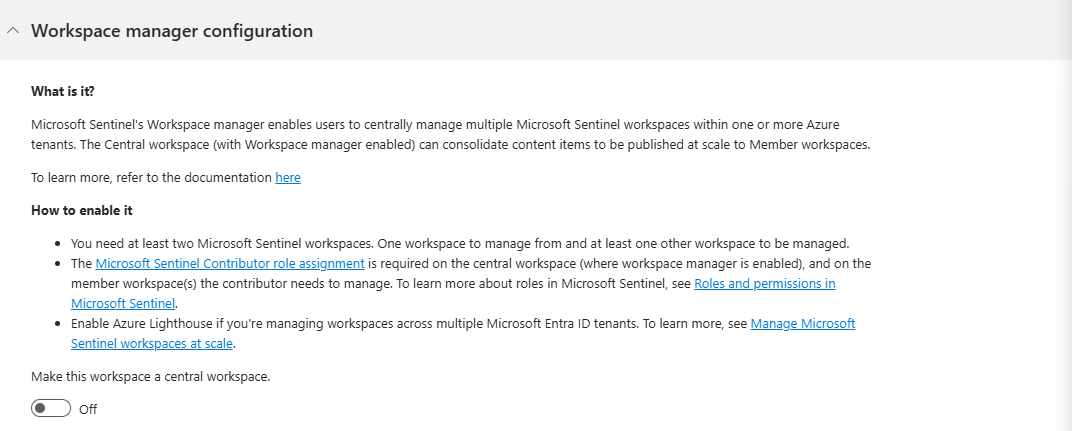
That's it. You've just promoted your workspace. It now has the power to manage others. Now, let's talk about the arsenal it can control...
The Battle Plan: Your Three-Step Deployment
Getting started is surprisingly straightforward. The whole process boils down to three logical steps.
Step 1: The Roll Call (Adding Your Workspaces)
First, you need to tell your central command post which other workspaces it's allowed to manage.
- From your central Sentinel workspace, navigate to Configuration > Workspace manager.
- Click on the Workspaces tab.
- Click + Add workspaces. You'll see a list of all the Sentinel workspaces you have access to (this is where Azure Lighthouse is your best friend for managing client tenants).
- Select the workspaces you want to bring into the fold and click Add.
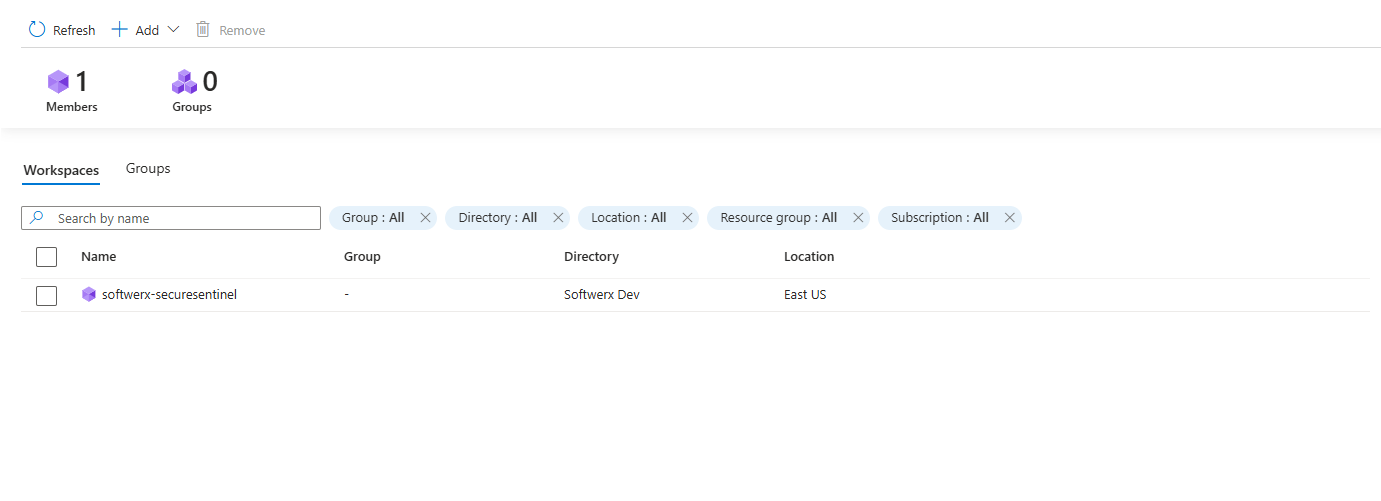
Simple. You've now established the chain of command.
Step 2: Forming the Squads (Creating Groups)
You probably don't want to push every rule to every workspace. Your financial services clients might need a different rule set than your healthcare clients. This is where groups come in. A group is just a logical collection of member workspaces that will receive the same content.
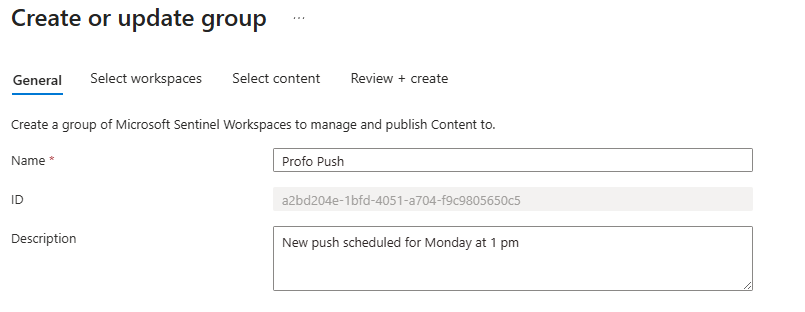
- Click on the Groups tab and then + Add Group
- General Tab: Give your group a smart name and description. Something like
EU_Clients_Standard_ContentorAnalytic_Rules_Testing.
- Select workspaces Tab: Choose which of the workspaces you just added should be part of this specific squad.
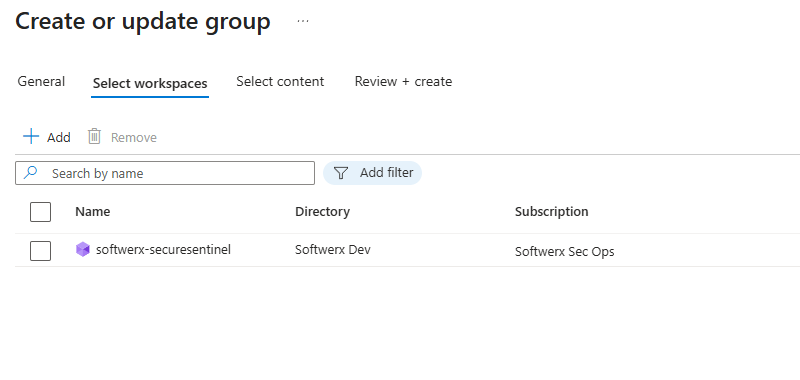
- Click Next. You've just defined who gets the content.
Step 3: The Deployment (Publishing Content)
This is the main event. This is where you decide what content your group gets.
- Select content Tab: You'll see a beautiful, organised list of all the content items (rules, workbooks, etc.) that exist in your central workspace. Go through the list and check the boxes next to everything you want to push to the members of this group.
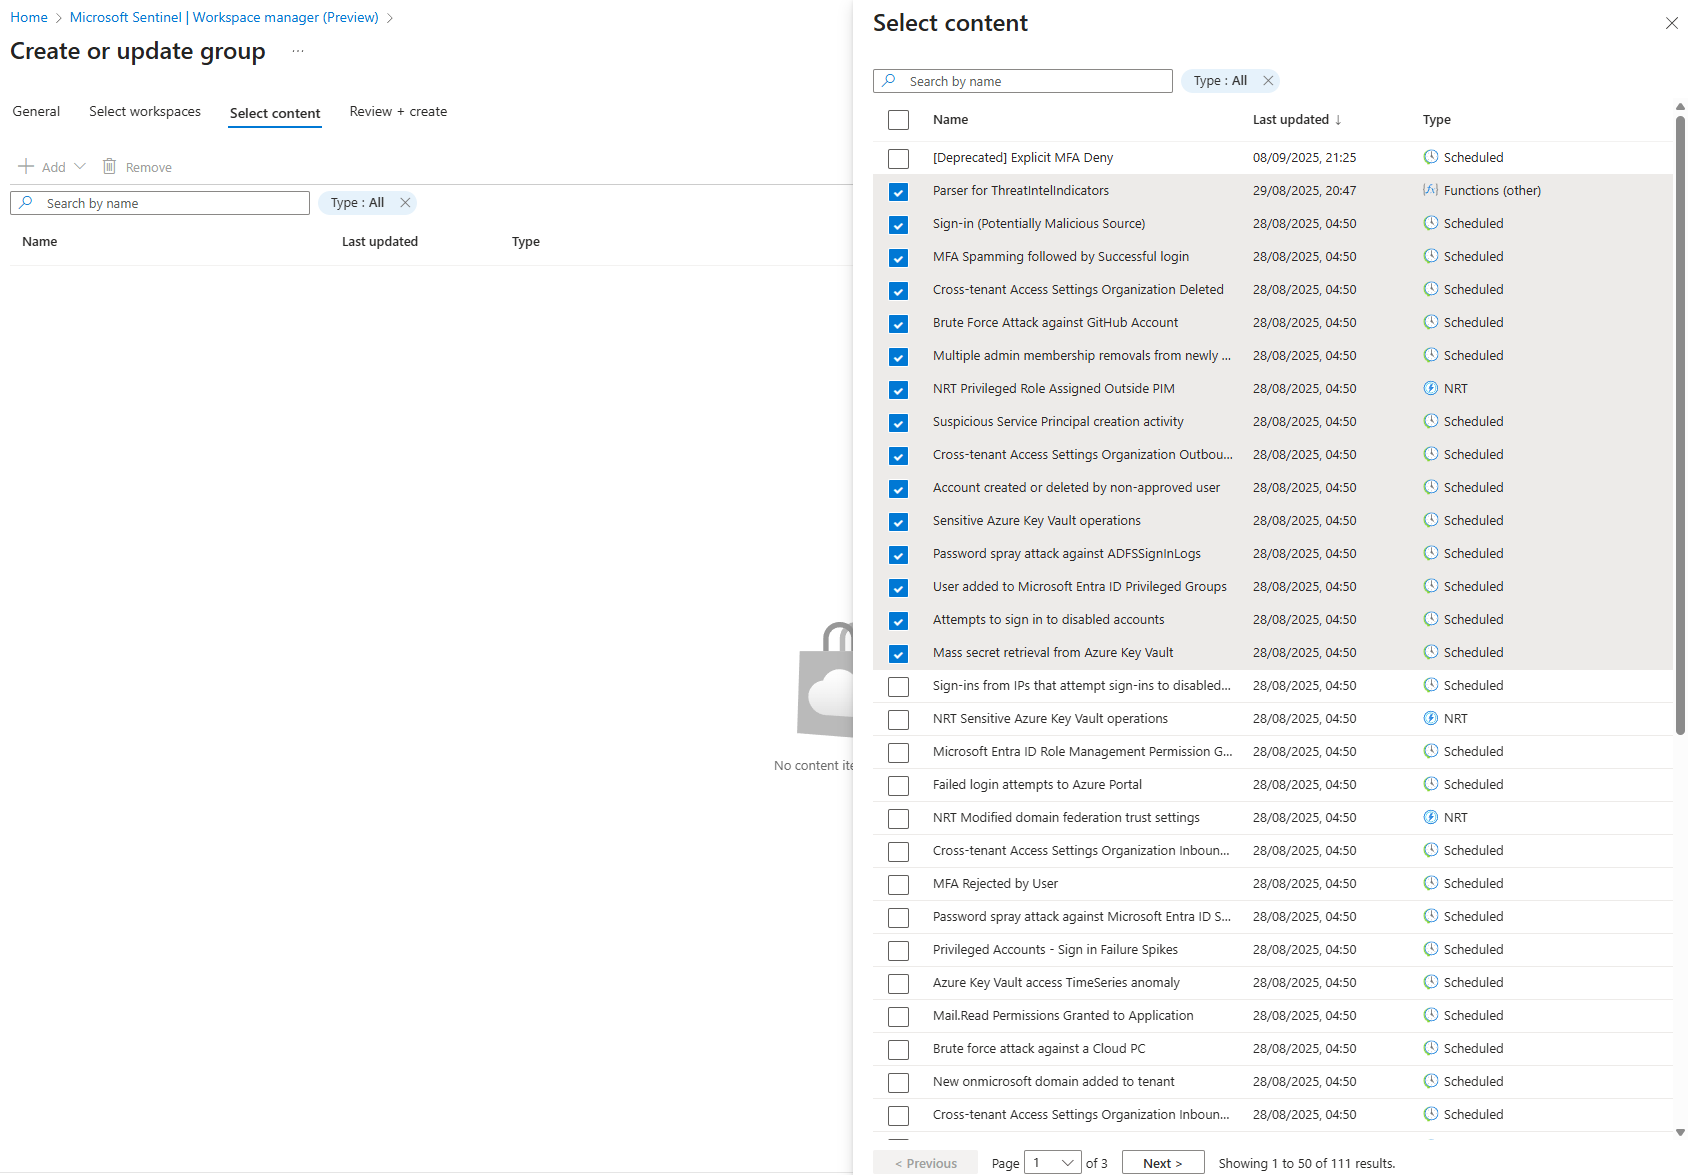
- Click Next, review your selections, and hit Create.
Step 4: Pushing the "Deploy" Button (The Final, Satisfying Click)
Alright, you've done the prep work. You've added your workspaces, you've created a group, and you've selected the content you want to deploy. You've essentially loaded the cargo plane. But the plane is still sitting on the runway.
Nothing actually happens until you give the final command.
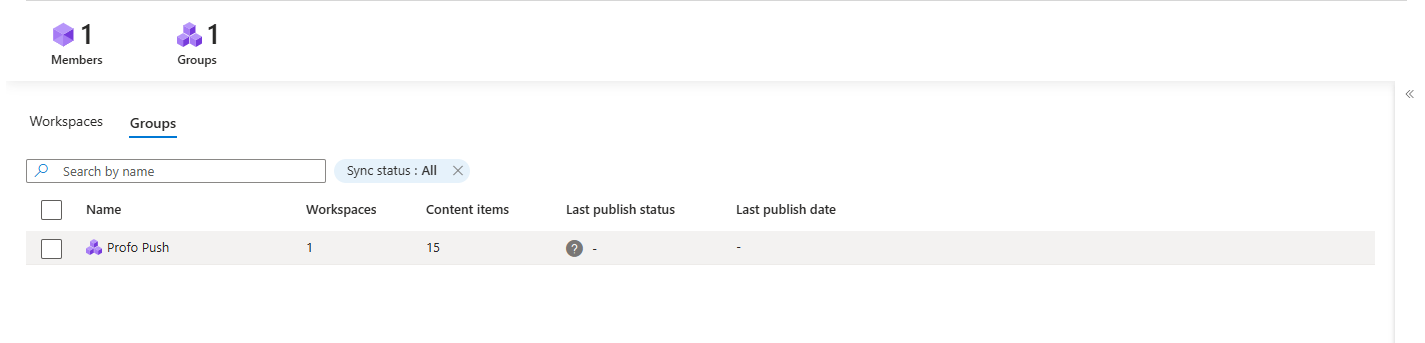
- On the Groups tab in Workspace manager, you'll see the group you just created. The "Last published" status will be blank.
- Select the group by clicking the checkbox next to its name.
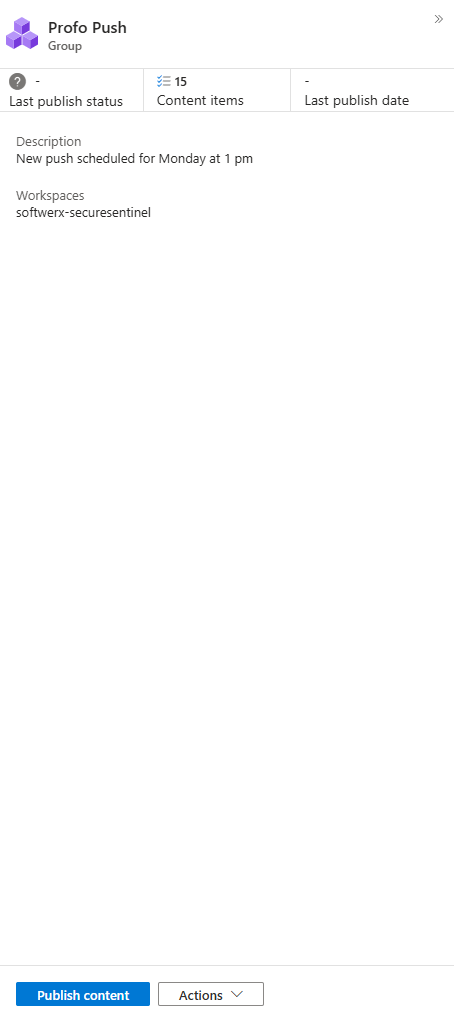
- Look at the bottom of the blade (there is also an additional button at the top). You'll see the Publish content button is now active. Click it.
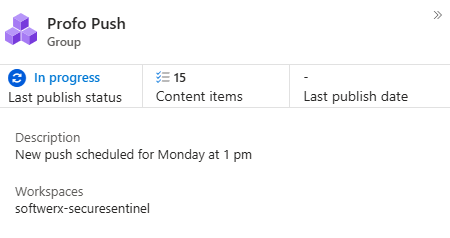
The deployment is now in motion. You've just done in two minutes what used to take two hours of manual clicking.
Checking the Results: Did It Actually Work?
Your content is being pushed out, but how do you know if it was successful?
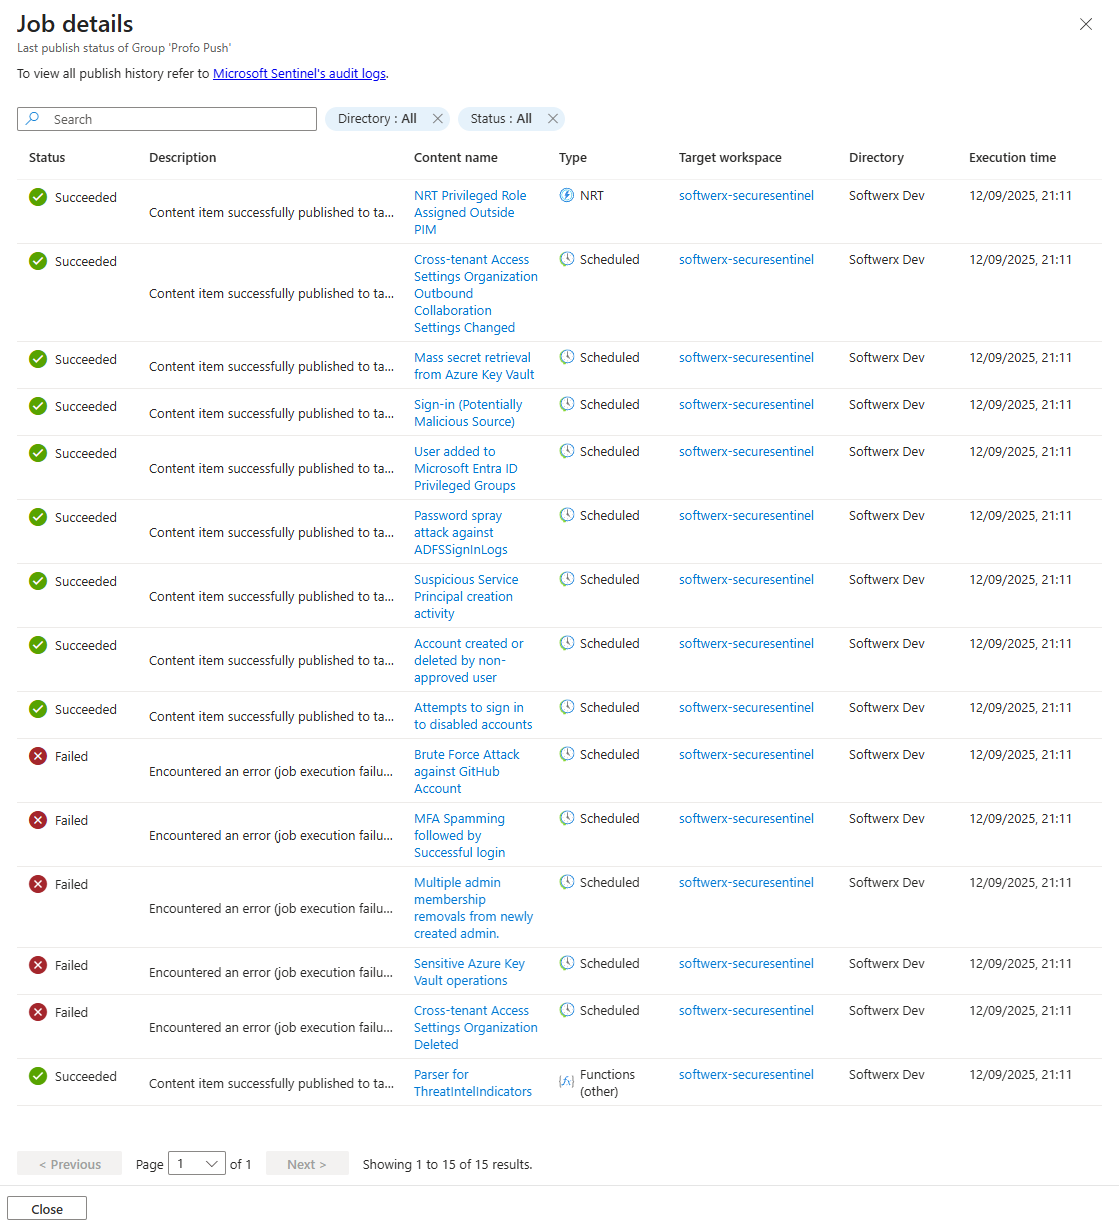
- Click on the name of the group you just published.
- Click on the Failed link.
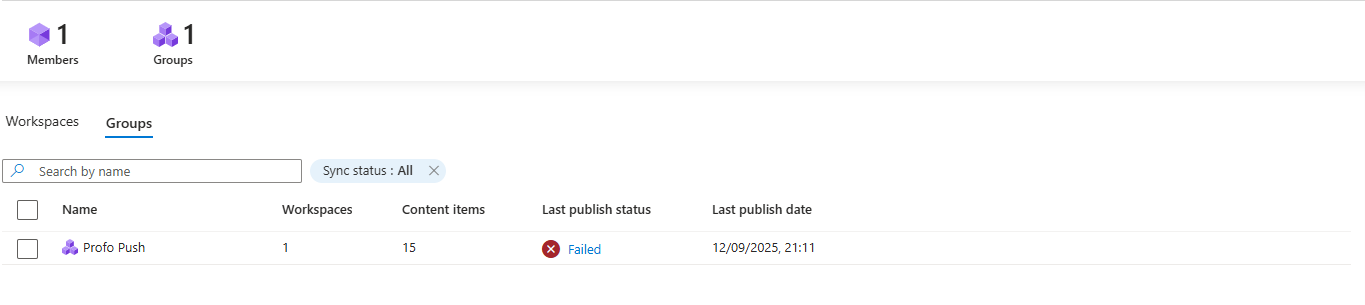
- Here you will see a log of every content you just tried to push together with any errors, including codes, really useful for troubleshooting (in my case, it was due to the maximum number of Analytic Rules limit in the Sentinel instance)
The Proof: Verifying in the Member Workspace
The final step is to see the fruits of your labour.
- Navigate to one of the Sentinel workspaces that was part of your group.
- Go to the Analytics blade.
- You will now see the new analytic rules you just published, neatly added to the rule list.
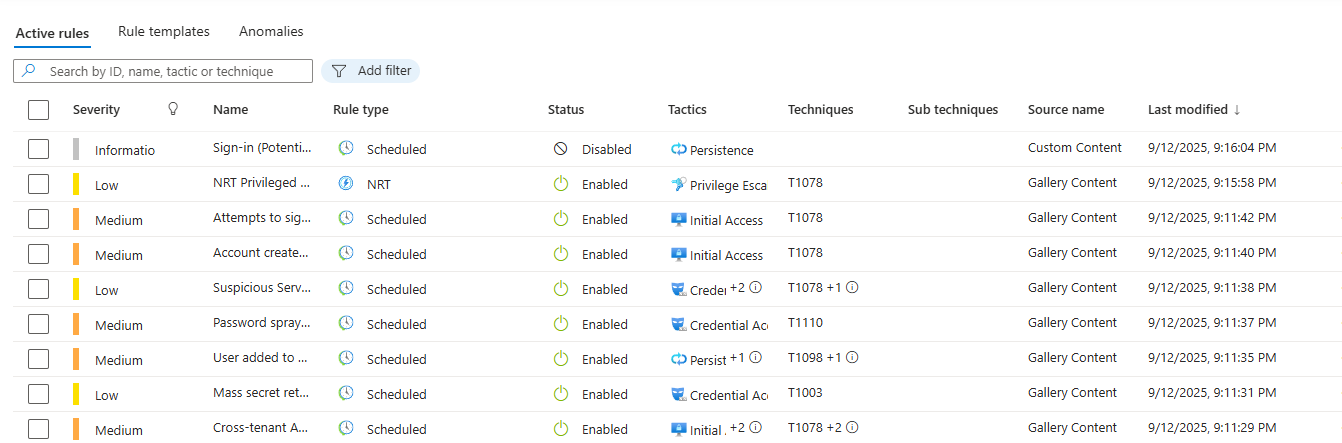
And there it is. You've successfully managed Sentinel content at scale. You've gone from being a manual click operator to a strategic conductor, ensuring all your security orchestras are playing from the same sheet music.
The Fine Print: The Honest "Gotchas" and Limitations
Now for the dose of reality. Workspace Manager is powerful, but it's not magic. It has some very specific rules and limitations you need to know about.
- The 2000 Operations Limit (The Multiplication Trap): There's a hard limit of 2000 "published operations" per group. The formula is
(member workspaces) * (content items). So, if you have 100 workspaces in a group, you can only publish 20 content items to them (100 * 20 = 2000). Plan your groups wisely; don't just dump everything into one giant group. - The Playbook Problem (A Manual Chore): This is the big one. Workspace Manager does not handle playbooks. You can push an automation rule that's supposed to trigger a playbook, but the connection to that playbook will be broken. You still have to go into each member's workspace manually and re-attach the playbook to the rule.
- One-Way Street (It's a Push, Not a Sync): Workspace Manager is a top-down command structure. It only pushes content from the central workspace to the members. If an analyst in a member workspace creates a new rule locally, the central manager will not know about it and cannot control it.
- The Roach Motel (Content Checks In, But It Doesn't Check Out): You can use Workspace Manager to add new content and update existing content. You cannot use it to delete content from member workspaces. If you want to remove a rule, you have to do it manually in each and every workspace.
Final Thoughts
Is Workspace Manager perfect? No. The lack of playbook support is a genuine pain. But is it a complete game-changer for anyone managing Sentinel at scale? Absolutely.
It takes the chaotic, artisanal process of manually keeping multiple environments in sync and turns it into a standardised, repeatable, and centrally-governed operation. It's the tool that lets you stop being a plate-spinner and start being an architect.
Class dismissed.