The Self-Updating Watchlist: Automating Sentinel with Logic Apps & Graph API

Alright, class.
Let's talk about one of the most powerful tools in your Sentinel armoury: the Watchlist. It's how you teach Sentinel about your world, your VIP users, your terminated employees, and your critical servers. Your most important analytic rules probably depend on these lists being accurate.
But a manually updated watchlist is a ticking time bomb.
Someone leaves the company, but you forget to add them to the "Terminated Employees" watchlist. A new executive starts, but no one adds them to the "VIPs" list for two weeks. These little mistakes create dangerous blind spots. Manual updates are boring, easy to forget, and a complete waste of your valuable time.
Today, we're going to build a robot whose only job is to be our watchlist librarian. This robot will check an Entra ID group every day and automatically add or remove users from our Sentinel watchlist to keep it perfectly in sync. No more manual updates. Ever.
The Prerequisites: Your Pre-Flight Checklist
This is an advanced-level quest. Before we begin, you need to have completed two previous lessons. This is not optional.
- You MUST have a Watchlist: You need an empty shell for our robot to populate. If you don't know how to create one, stop right now and follow my In-Depth Guide to Watchlists. For this guide, create a watchlist with the alias
VIPUsers.
- You MUST have your Graph API "keys": This entire automation runs on the Microsoft Graph API. You need an App Registration with the right permissions, a Client Secret stored in a Key Vault, and a Logic App with a Managed Identity that can access it. If that sentence sounded like gibberish, stop right now and complete my Guide to the Graph API and Logic Apps.
Got all that? Good. Let's start building our robot.
Step 1: Laying the Foundation (The Logic App and its Parameters)
- Readily available Logic App (that we created in the previous steps). Give it a descriptive name like
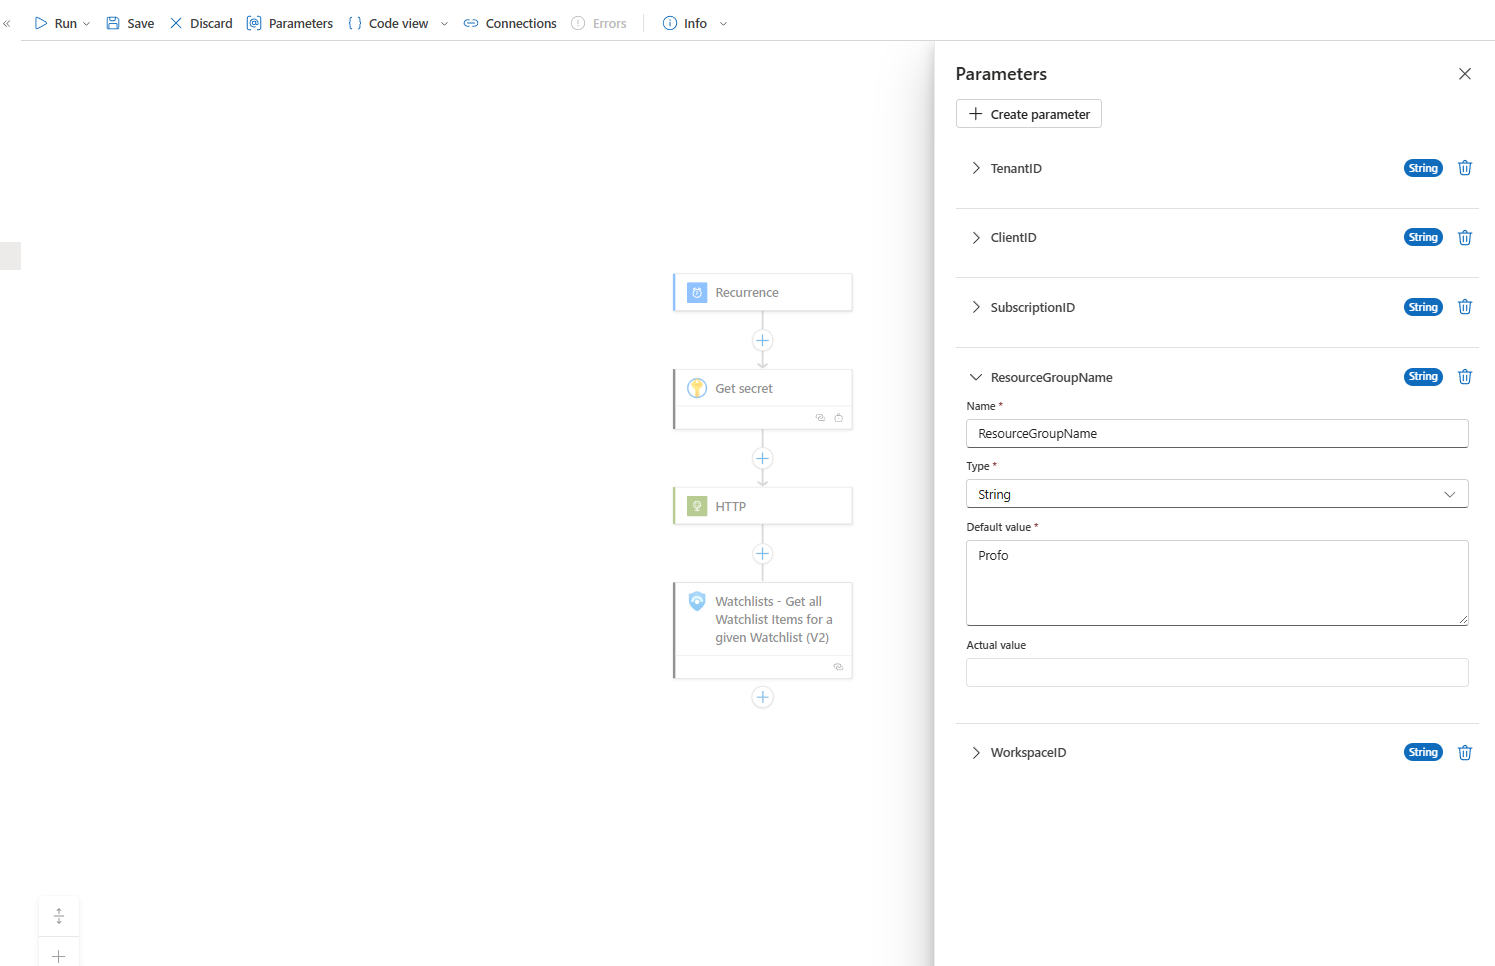
Sentinel-Watchlist-Automation. - The Parameters: Before we add any actions, we're going to do something the pros do: define our parameters. This lets us easily change things like Tenant IDs or resource names later without digging through the code.
- In the Logic App Designer, click on Parameters in the top menu.
- Add parameters for your
TenantID,ClientID(from your App Registration),SubscriptionID,ResourceGroupName, andWorkspaceID(useStringasType)
- The Trigger: Click Add a trigger and choose the Recurrence trigger. For a VIP list, running this once a day is perfect. Set the
Intervalto1and theFrequencytoDay(depending on your scenario, this can and should of course be adjusted)

Step 2: The Logic - Getting the "Source of Truth"
Our first real job is to get the current list of members from our Entra ID "VIPs" group.
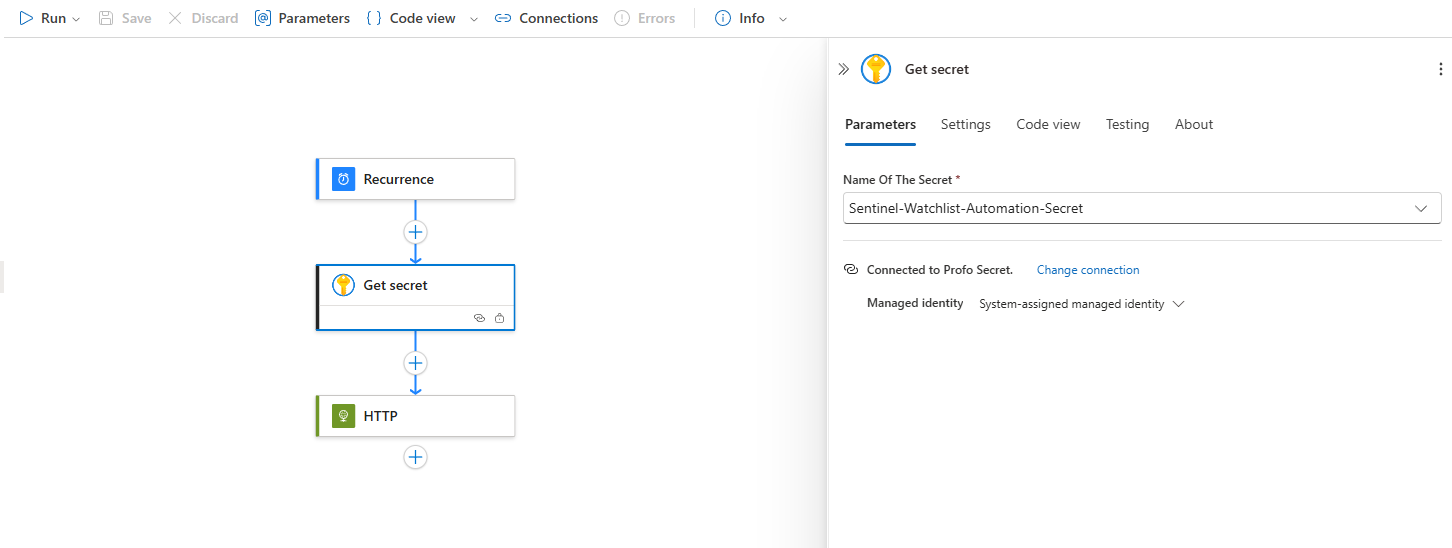
- Get Secret: Add an action, search for Azure Key Vault, and select Get secret. Point it to the Key Vault and the secret you created in the prerequisite guide (remember to add the right permissions to the Logic App Identity so it can actually read the secret!)
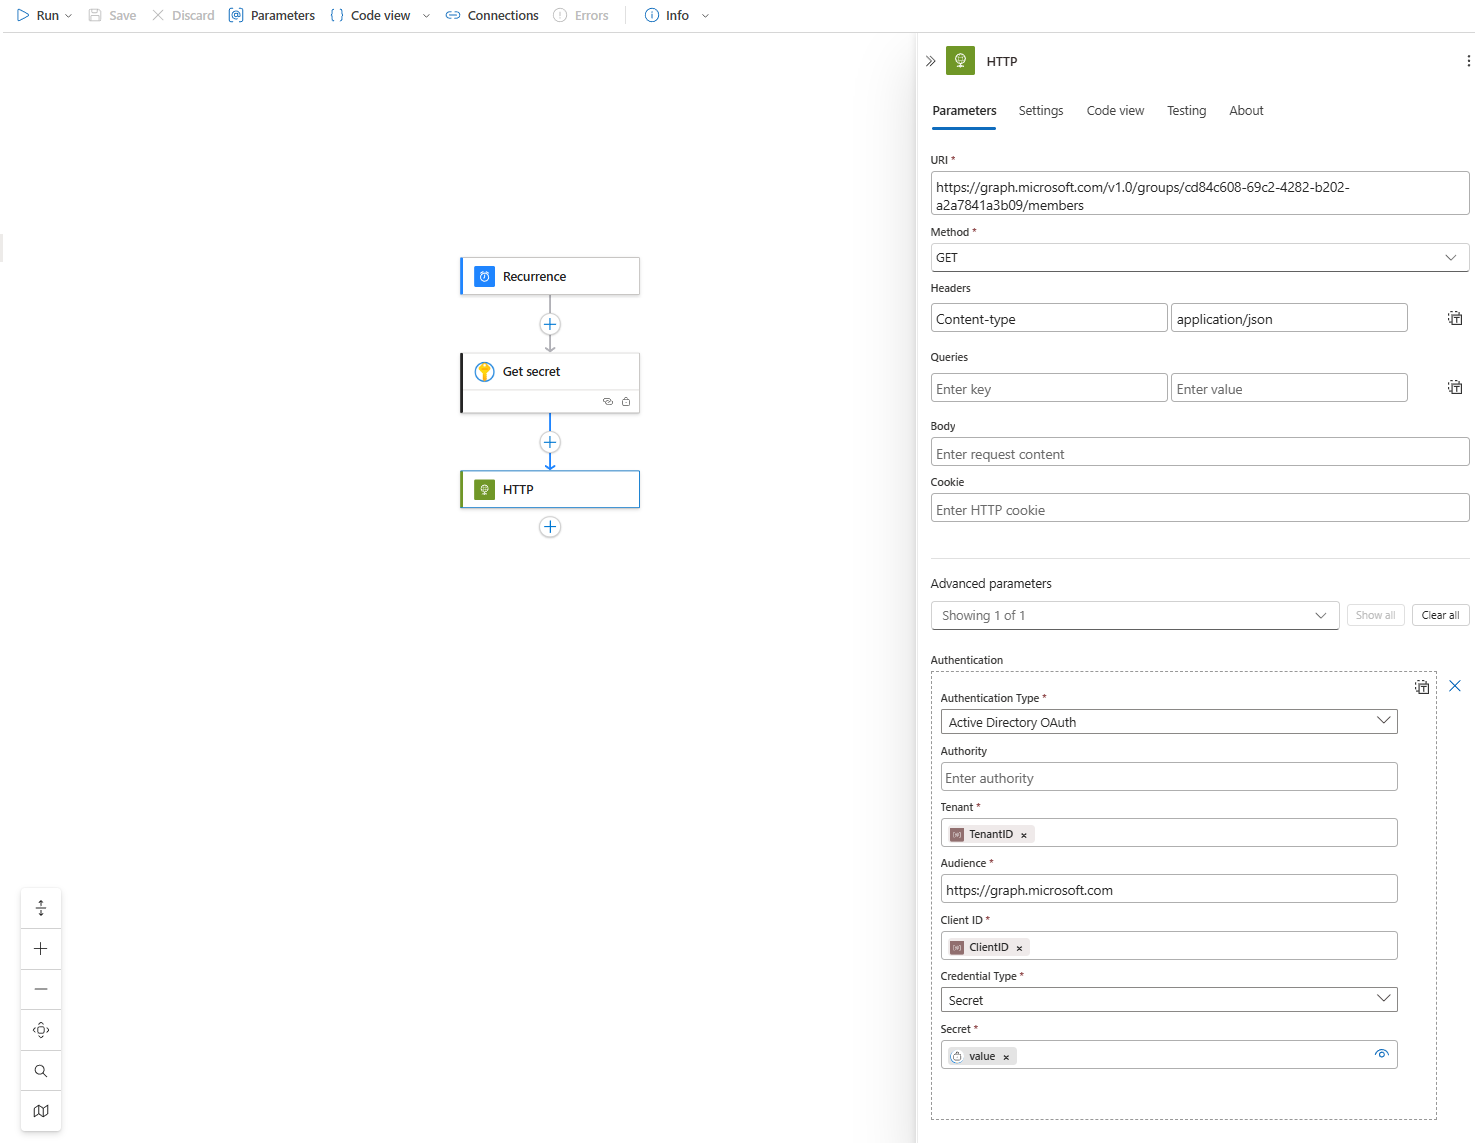
- HTTP - Get Group Members: Add an HTTP action. This is where we use our API keys to ask the Graph API for the list of VIPs.
- Method:
GET - URI:
https://graph.microsoft.com/v1.0/groups/{your-group-id}/members(Get the Group Object ID from the Entra ID portal). - Configure the Authentication section exactly as we did in the prerequisite guide, using your new parameters for
TenantIDandClientID, and thevaluefrom the "Get secret" action for the Secret with audiencehttps://graph.microsoft.com
Step 3: The Logic - Getting the "Current State"
Now we have the list of who should be in the watchlist. Next, we need to get the list of who is currently in the watchlist so we can compare the two.
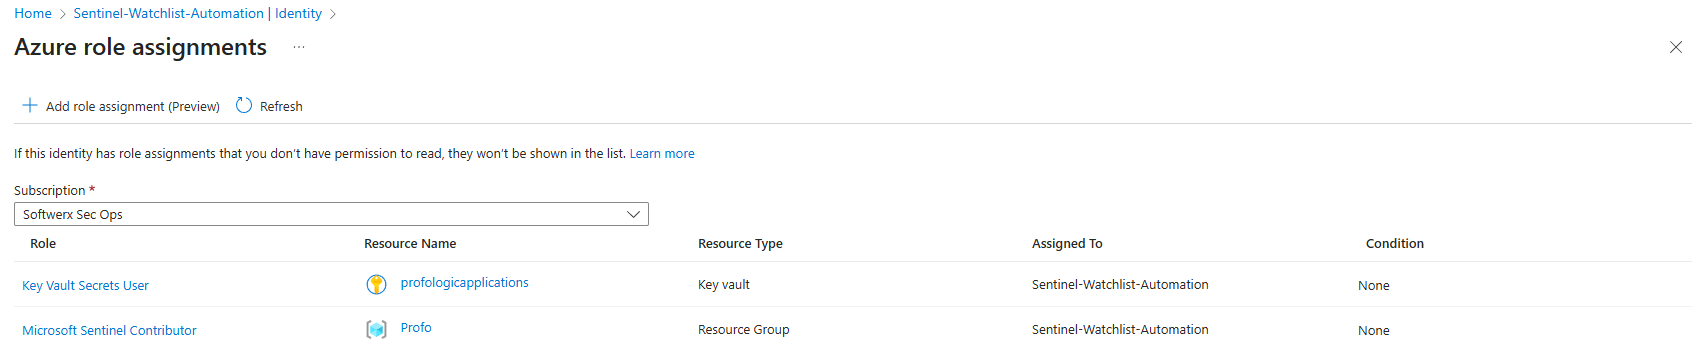
First and foremost, ensure that your logic application has permission to query/add the data in Sentinel. You can assign Sentinel Contributor access on the resource group level (where your Sentinel resides)
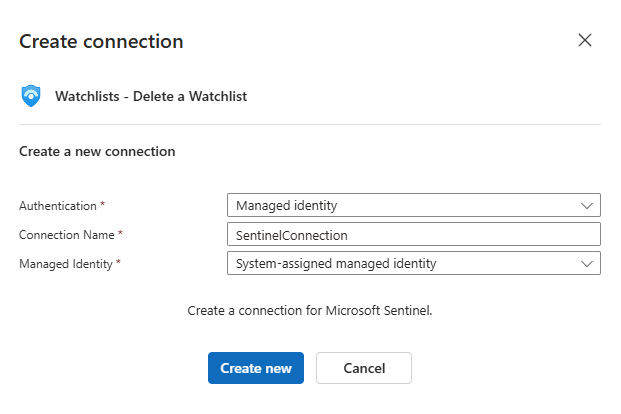
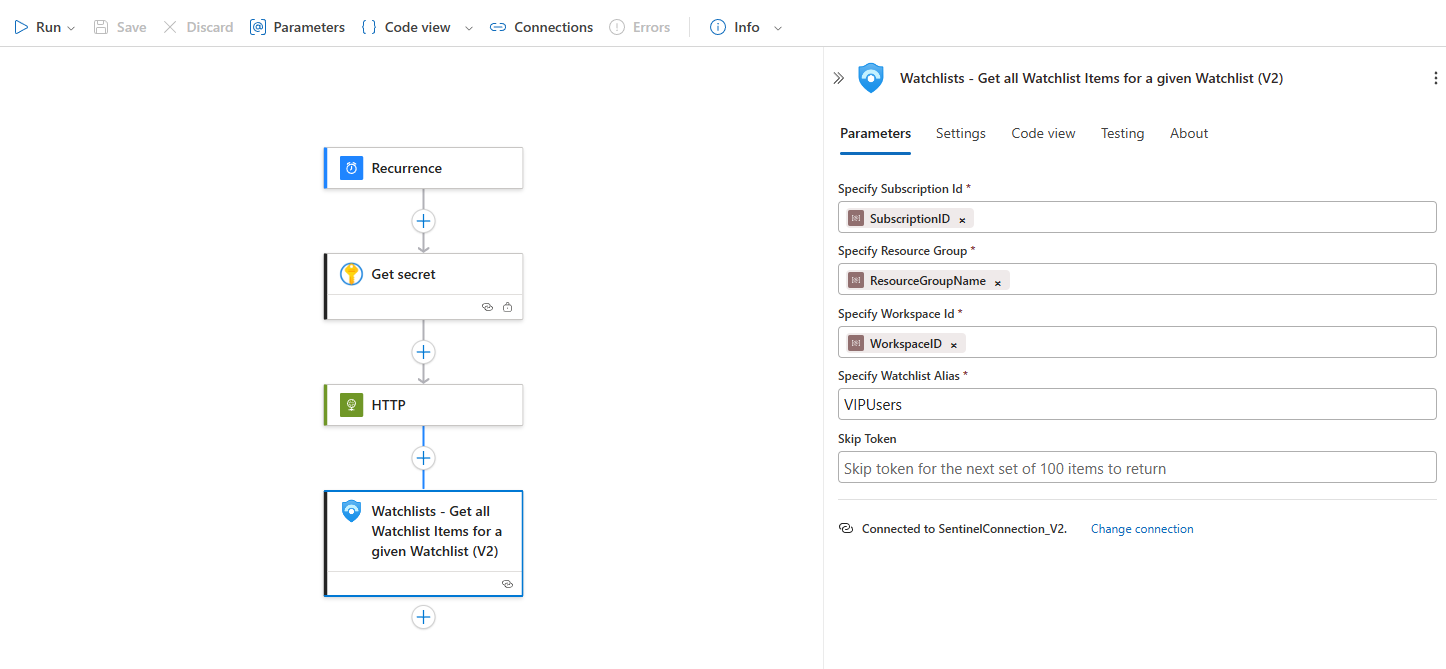
- List Watchlist Items: Add a new action. Search for Azure Sentinel and choose the action Watchlists - Get all Watchlist Items for a given Watchlist (V2)
- Use a managed identity for a connection.
- Add dynamic fields from parameters + Watchlist Alias
VIPUsers
Step 4: The Brain Surgery - Comparing the Lists
Alright, the heavy lifting is done. Your Logic App has successfully fetched two crucial lists:
- From the HTTP action: The "source of truth" list of users who should be in our watchlist, straight from the Enta ID group.
- From the "List Watchlist Items" action: The "current state" list of users who are actually in our Sentinel watchlist right now.
But as you've seen from the raw outputs, these two lists are structured completely differently. Trying to compare them directly is a recipe for a migraine. The professional way to handle this is to first extract the only piece of information we care about for the comparison the User Principal Name (UPN) from each source and put them into simple, clean lists (arrays).
This is where we'll use a couple of Initialize Variable actions.
Part A: Prepare Your Work Area
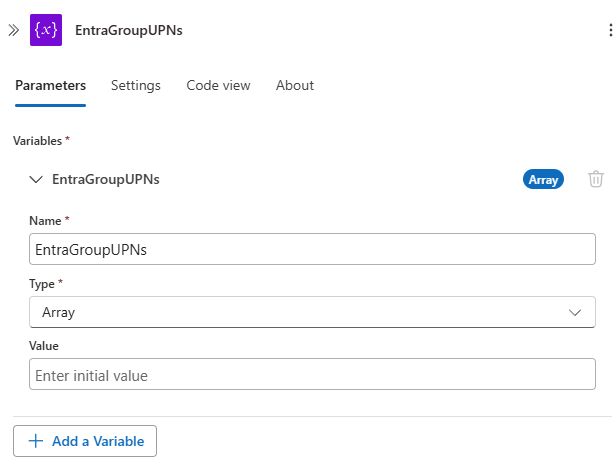
Right after your Recurrence trigger at the very top of your Logic App, add two Initialize variable actions. This creates the empty boxes we'll need later.
- First Variable:
- Name:
EntraGroupUPNs - Type:
Array
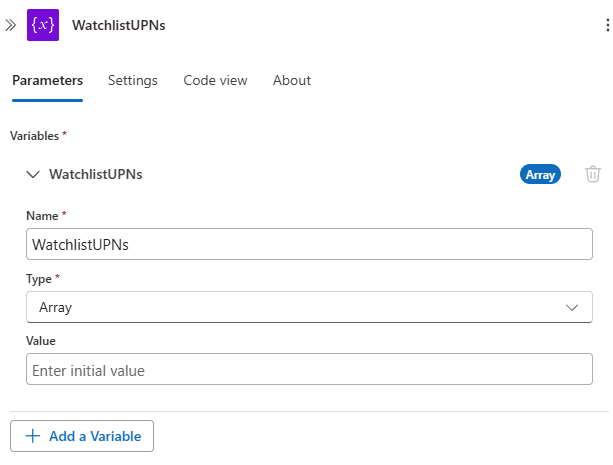
- Second Variable:
- Name:
WatchlistUPNs - Type:
Array
Part B: Extract and Clean the Data
Now, let's go back to the main flow of your Logic App. We'll add the steps to populate our new array variables.
- After your HTTP action, add a Parse JSON action.
- Content: Use the
Bodyfrom the HTTP action. - Schema: Use the "Generate from sample" feature with the raw output from your API call (you need to run the app once to get it and then get it from the "Run history" results). This makes the next step possible.
Below is an example of a schema in the Logic Application presented in this blog post.
{
  "type": "object",
  "properties": {
    "@@odata.context": {
      "type": "string"
    },
    "value": {
      "type": "array",
      "items": {
        "type": "object",
        "properties": {
          "@@odata.type": {
            "type": "string"
          },
          "id": {
            "type": "string"
          },
          "businessPhones": {
            "type": "array"
          },
          "displayName": {
            "type": "string"
          },
          "givenName": {},
          "jobTitle": {},
          "mail": {
            "type": "string"
          },
          "mobilePhone": {},
          "officeLocation": {},
          "preferredLanguage": {},
          "surname": {},
          "userPrincipalName": {
            "type": "string"
          }
        },
        "required": [
          "@@odata.type",
          "id",
          "businessPhones",
          "displayName",
          "givenName",
          "jobTitle",
          "mail",
          "mobilePhone",
          "officeLocation",
          "preferredLanguage",
          "surname",
          "userPrincipalName"
        ]
      }
    }
  }
}- After that Parse JSON action, add a For each loop.
- Select an output...: Select the
Body valuearray from your new "Parse JSON" action.
- Select an output...: Select the
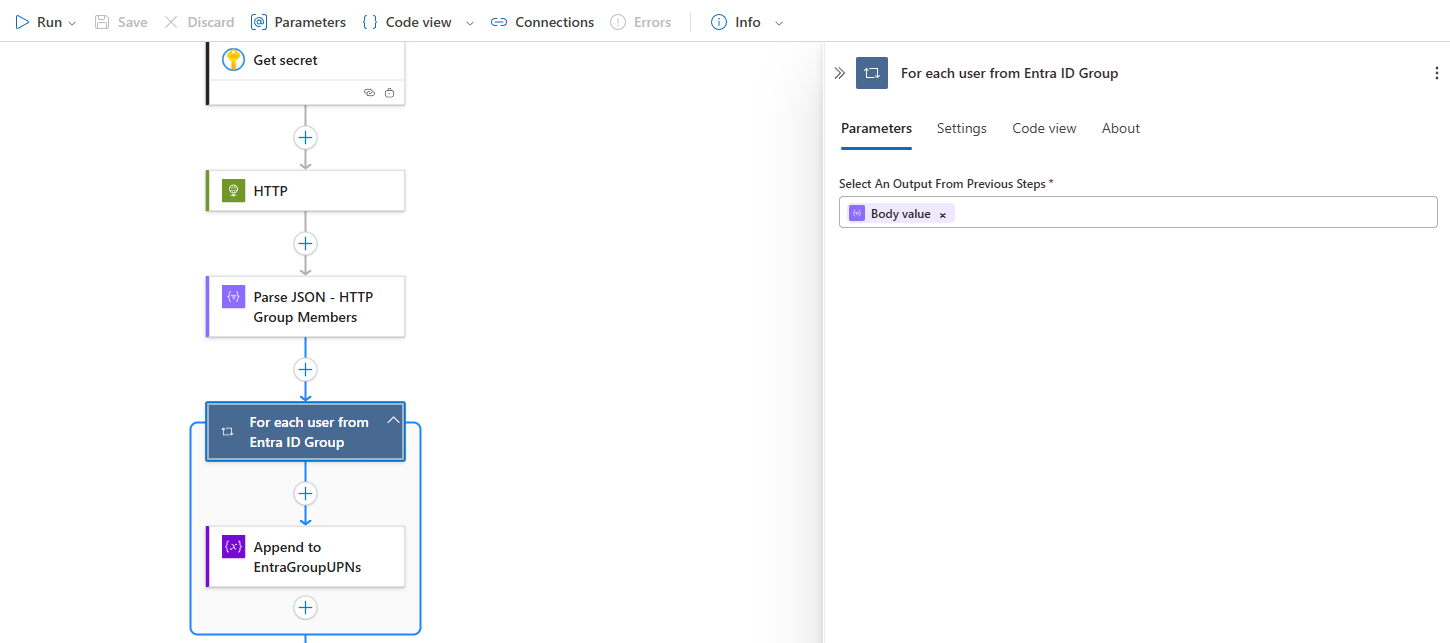
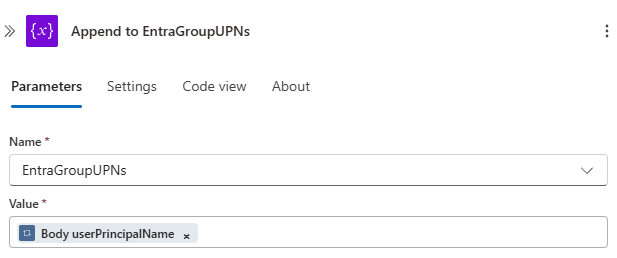
- Inside the loop, add an Append to array variable action.
- Name:
EntraGroupUPNs - Value: Select
userPrincipalNamefrom the dynamic content inside the loop (it's the "Current item")
- After your "List Watchlist Items" action, add a For each loop.
- Select an output...: This is a critical step. The correct expression to loop through the array of items is:
@body('Watchlists_-_Get_all_Watchlist_Items_for_a_given_Watchlist_(V2)')?['properties']?['watchlistItems']
- Select an output...: This is a critical step. The correct expression to loop through the array of items is:
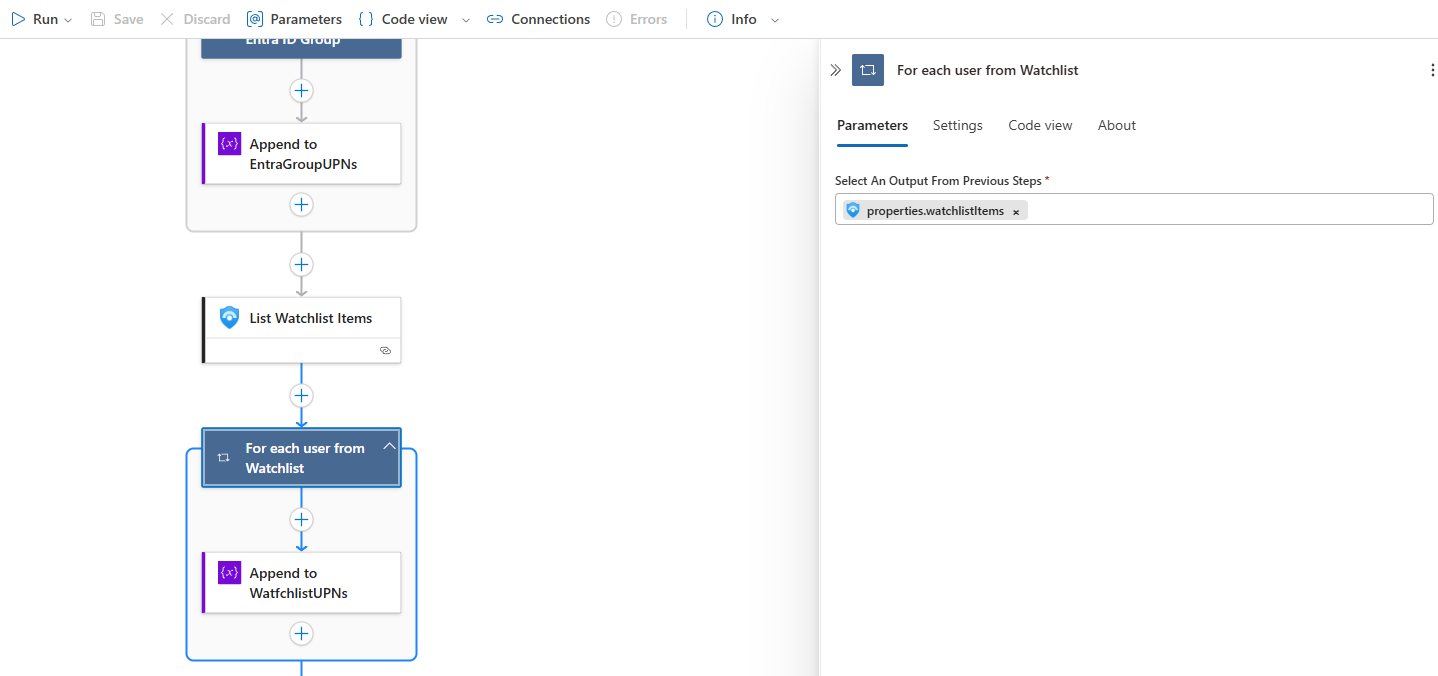
- Inside the loop, add an Append to array variable action.
- Name:
WatchlistUPNs - Value: The UPN is buried deep inside. Use this expression to get it:
@item()?['properties.itemsKeyValue']?['UserPrincipalName']

Professor's Note: At this point, the hard work is done. You now have two simple, clean arrays of UPN strings (EntraGroupUPNs and WatchlistUPNs) ready for comparison.
Part C: The Comparison Logic (The Filter Arrays)
Now that we have our clean arrays, we can finally compare them. Add these actions at the end of your Logic App flow.
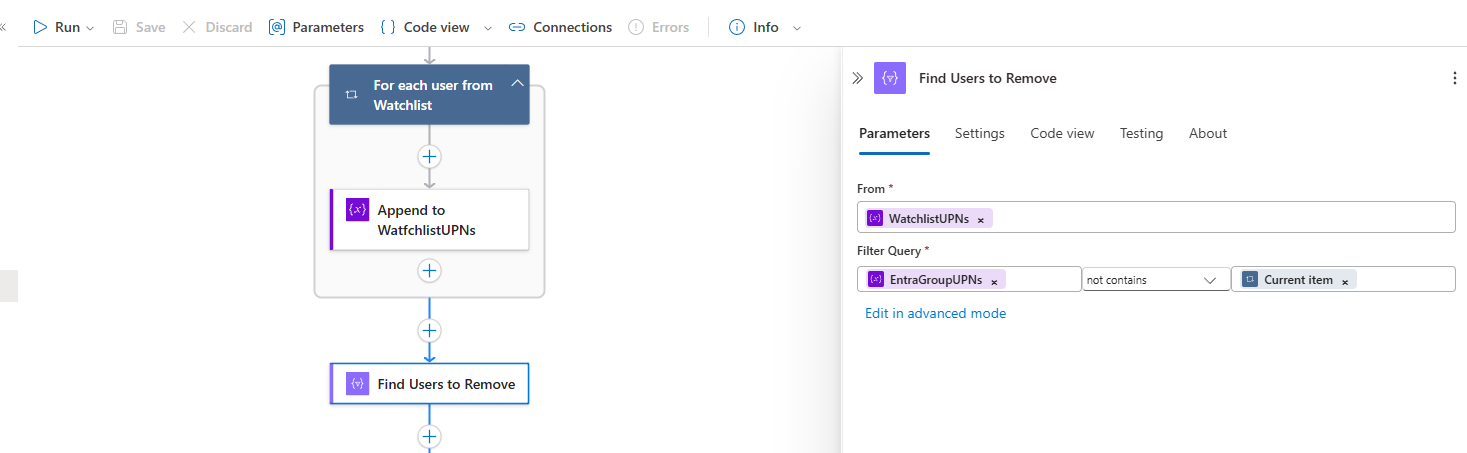
To Find Users to REMOVE:
- Add a Filter array action.
- From: Select the
WatchlistUPNsvariable. - Click Edit in advanced mode for the filter condition.
- Expression:
@not(contains(variables('EntraGroupUPNs'), item())) - Explanation: This expression says, "For each
item(a UPN string) in myWatchlistUPNsarray, check if thatitemis also in theEntraGroupUPNsarray. Thenot()function then flips the result, so we only keep the items that are NOT found." - The output is a clean list of UPN strings that need to be removed.
- From: Select the
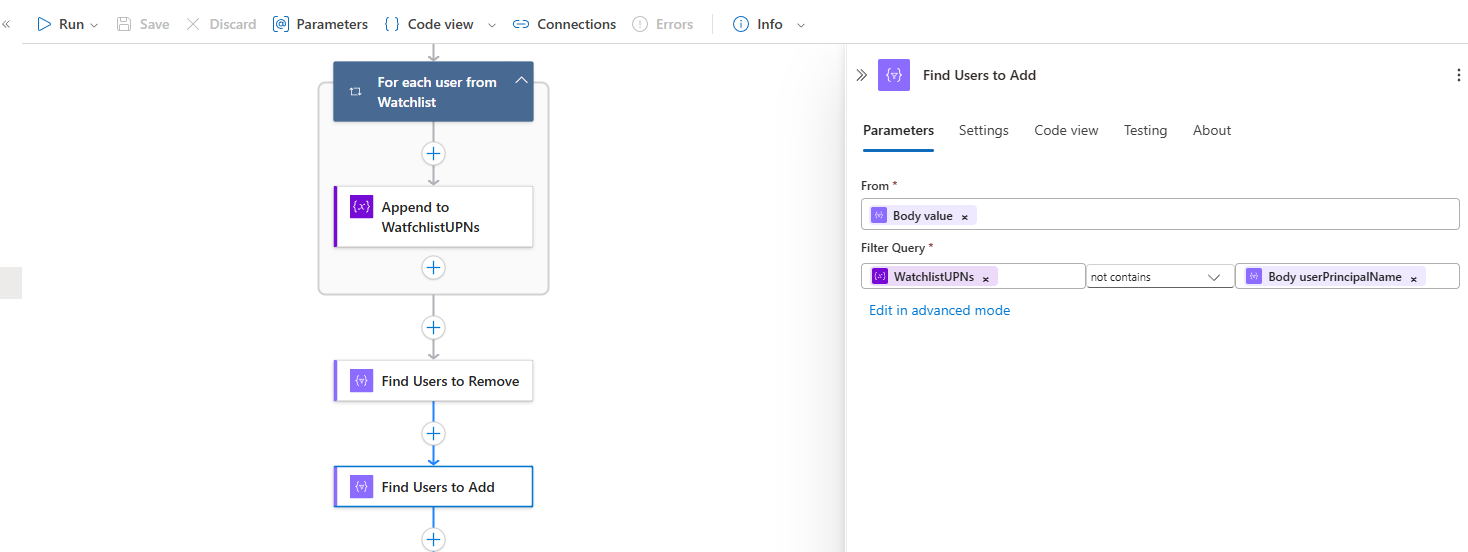
To Find Users to ADD:
- Add another Filter array action.
- From: Select the
Body valuearray from your "Parse JSON" action (the one that parsed the HTTP response). This is the full list of user objects from Entra ID. - Edit in advanced mode for the filter condition.
- Expression:
@not(contains(variables('WatchlistUPNs'), item()?['userPrincipalName'])) - Explanation: This says, "For each
item(a full user object) from the Entra group list, take itsuserPrincipalNameand check if that U-PN is in ourWatchlistUPNsarray. Thenot()flips the result, so we only keep the full user objects for people who are NOT already in the watchlist." - The output is a list of full user objects for the new people who need to be added.
- From: Select the
Step 5: Taking Action - Syncing the Watchlist
Now that we have our two clean lists of UPNs (EntraGroupUPNs and a full list of user objects to add), it's time to execute the changes.
Part A: Removing Obsolete Users
This is where we need to be smart. The "Delete a watchlist item" action needs the unique GUID for the watchlist row. To get that, we need to loop through our original, full list of watchlist items (it will make more sense just in a second)
- Add a For each loop.
- Select an output from previous steps: Provide the full path to the array of users using this expression:
@body('List_Watchlist_Items')?['properties']?['watchlistItems']
- Select an output from previous steps: Provide the full path to the array of users using this expression:
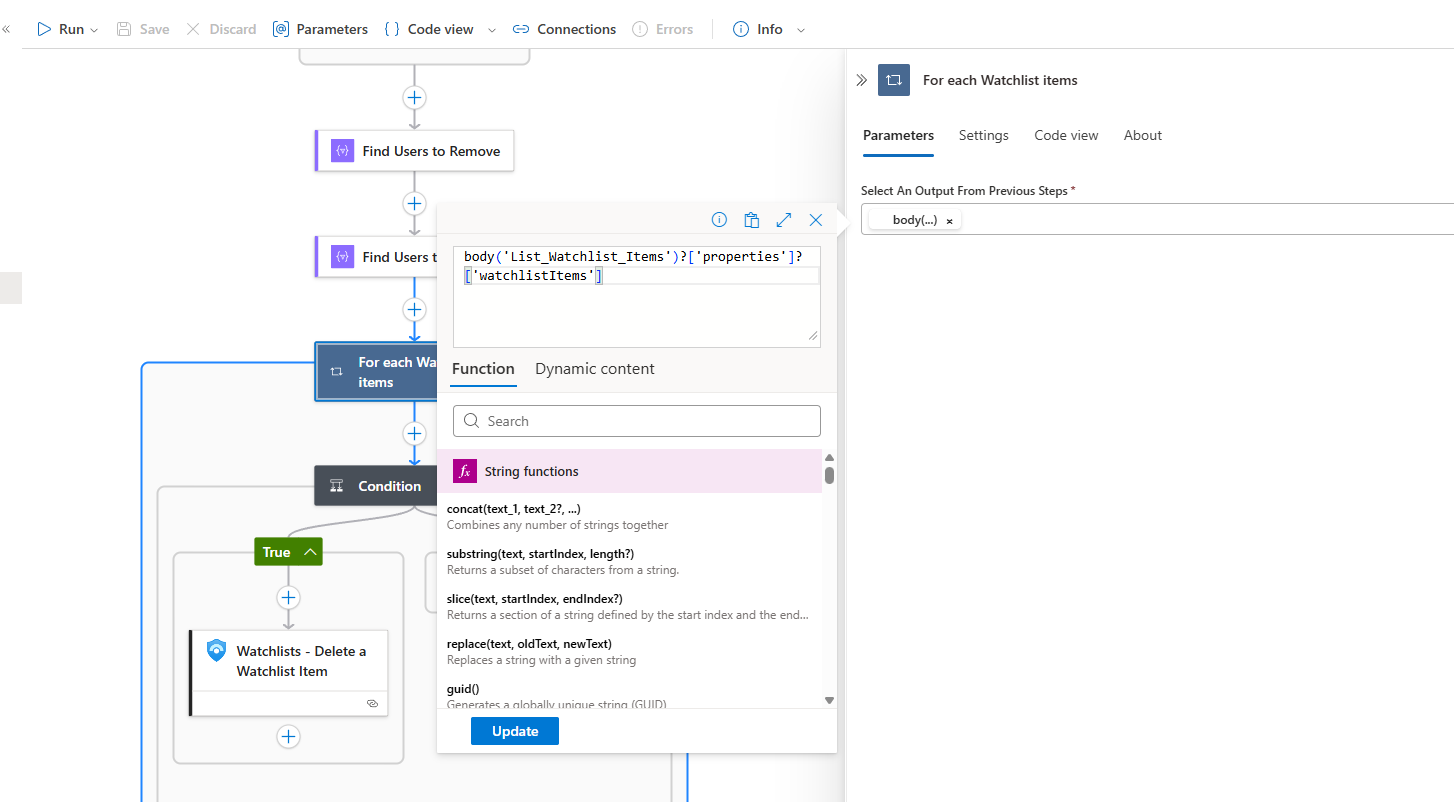
- Inside the loop, add a Condition control. We will now build the correct logic using the three boxes provided.
- In the middle dropdown box, select the operator is equal to.
- In the box on the right, type the word false.
In the first box on the left, click to open the dynamic content/expression editor. Select the Expression tab. Paste the following expression:
@contains(variables('EntraGroupUPNs'), item()?['properties.itemsKeyValue']?['UserPrincipalName'])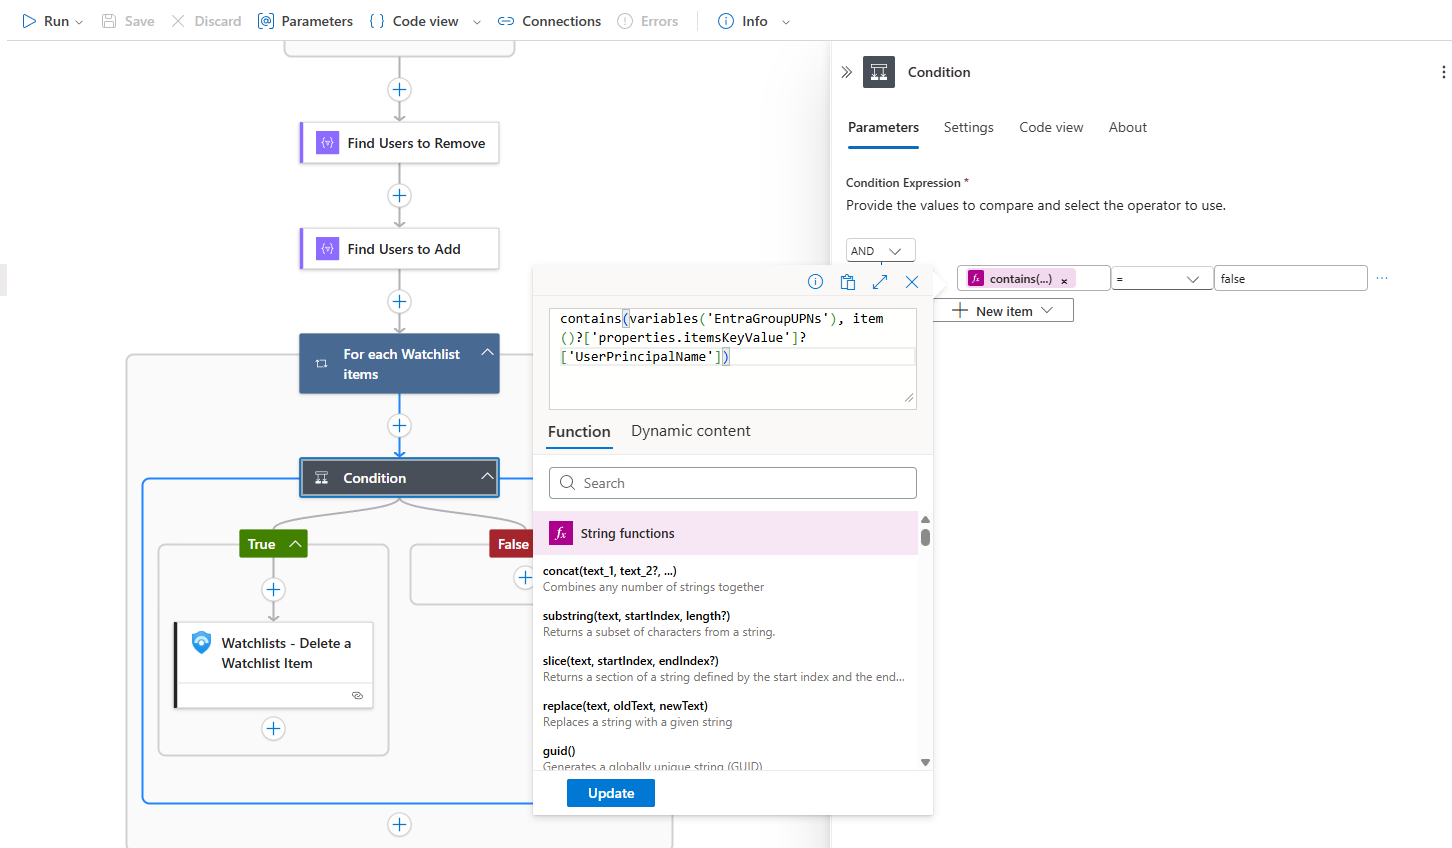
Professor's Breakdown:
The critical difference is the @ symbol at the start of the expression in the first box. This tells the Logic App engine: "Evaluate this as a function," rather than treating it as a plain string of text.
- The
@contains(...)expression asks: "Is the current watchlist user's UPN found inside our officialEntraGroupUPNslist?" This will result in a true boolean value:trueorfalse. - Our condition
is equal to falsewill therefore only be met for users who are NOT on the Entra ID group list. - This means the "If true" branch of our condition is now our "delete" path, correctly identifying only the users who need to be removed from the watchlist.
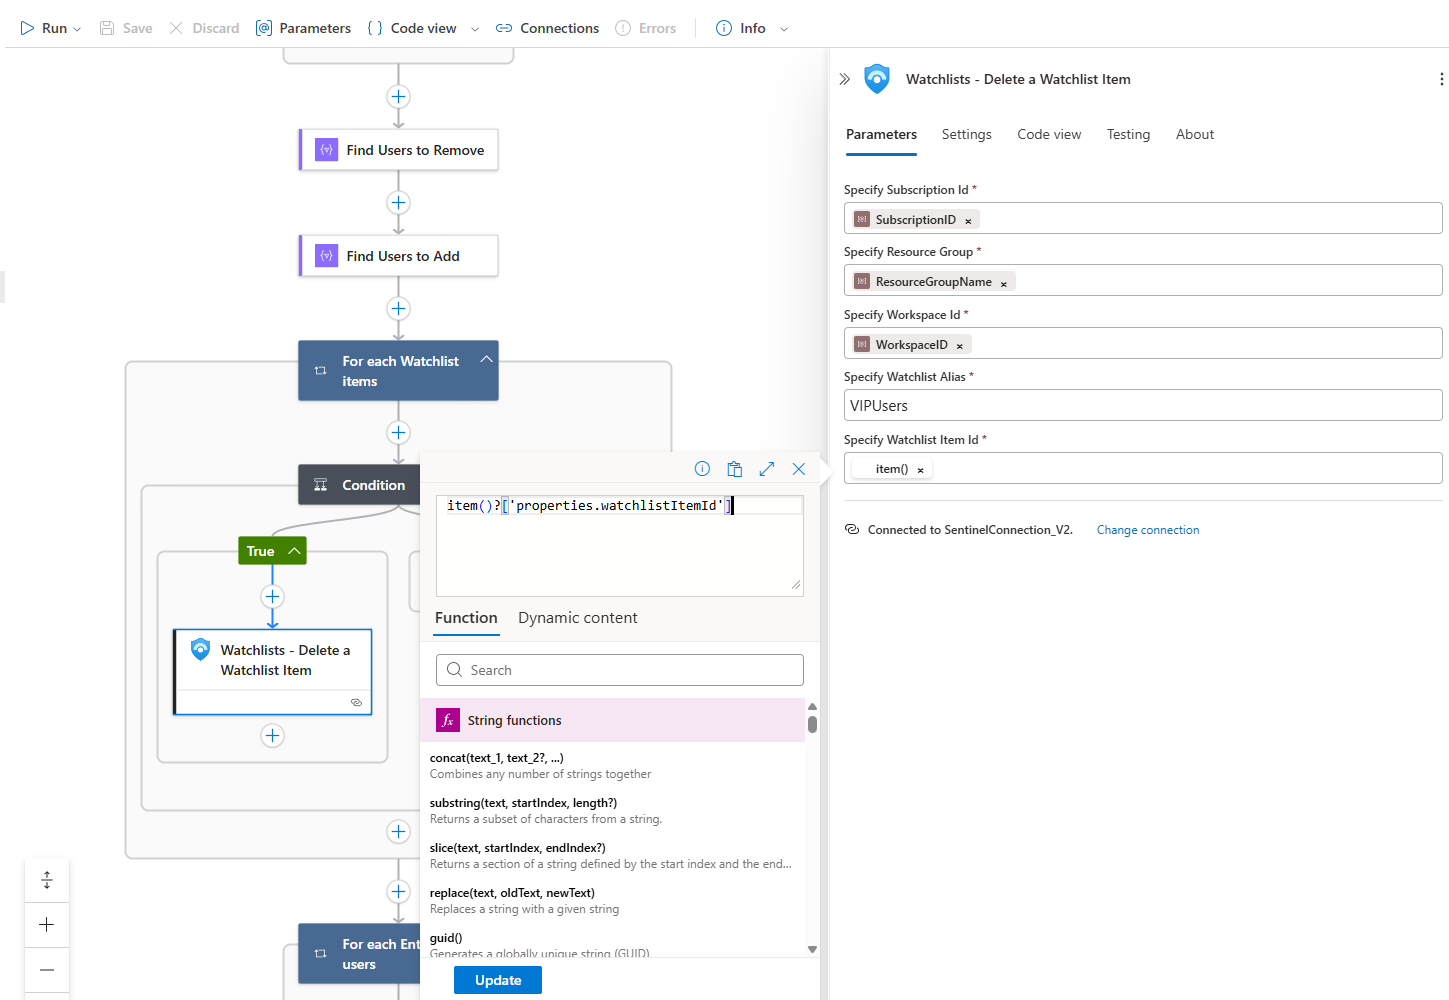
- Inside the "If true" branch, add the Azure Sentinel action Delete a watchlist item.
- Fill out the workspace and watchlist name parameters.
- For the Watchlist Item ID, provide the GUID the API expects using this expression:
@item()?['properties.watchlistItemId']
Adding New Users
Now for the final piece of our automation: adding the new users to our watchlist.
- Add a final For each loop.
- Select an output from previous steps: Use the
Bodyfrom your "Filter array - Find Users to Add" action. This contains the full user objects for the people we need to add.
- Select an output from previous steps: Use the
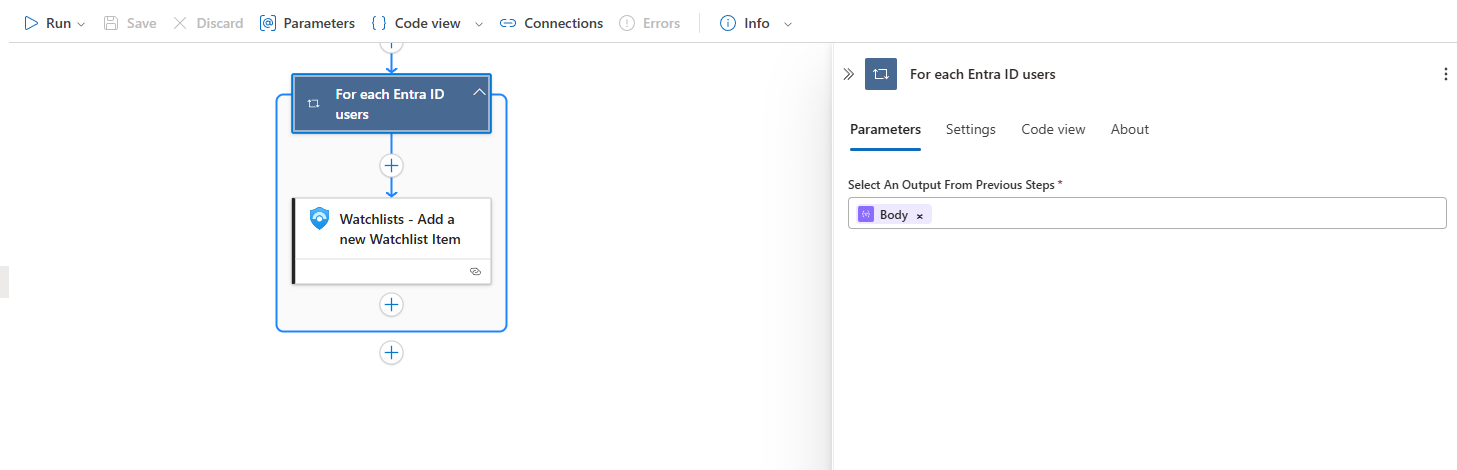
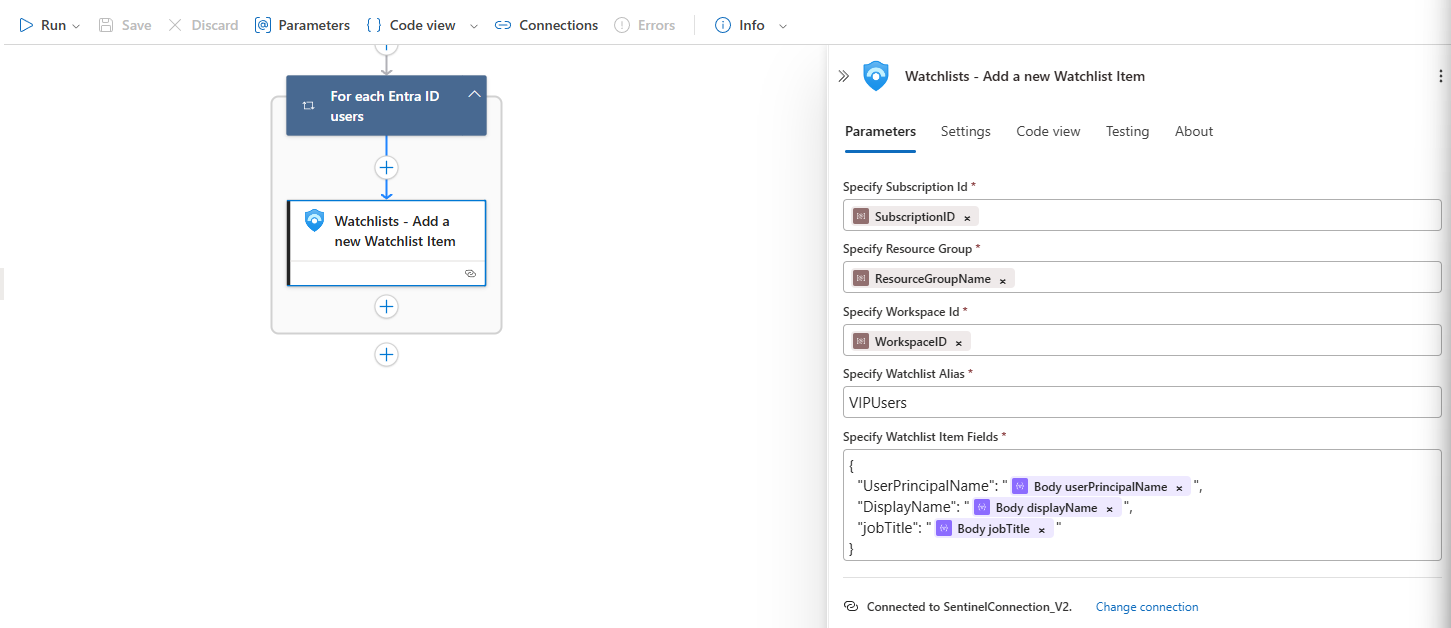
- Inside the loop, search for the Azure Sentinel connector and select the action named Watchlists - Add a new Watchlist Item.
- Fill out the top part of the action card using your parameters for the workspace and select your
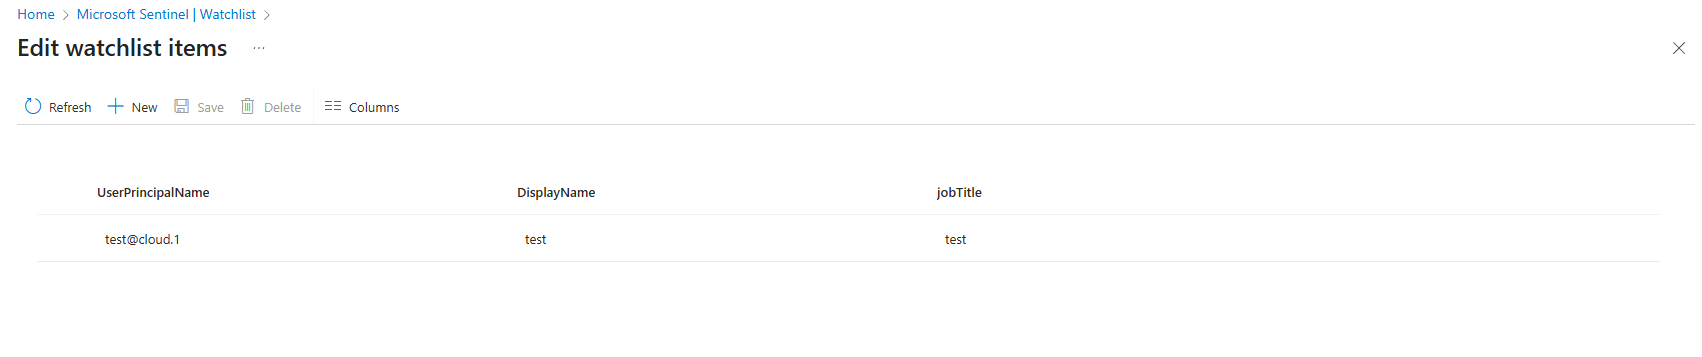
VIPUserswatchlist. - Watchlist Item Properties: Copy the JSON below into the field, this way we can match our existing Watchlist Fields (in our VIPUsers Watchlist, we have 3 columns - userPrincipalName, displayName and jobTitle)
{
  "UserPrincipalName": "@{item()?['userPrincipalName']}",
  "DisplayName": "@{item()?['displayName']}",
  "jobTitle": "@{item()?['jobTitle']}"
}
The Payoff: Seeing It in Action
Save your Logic App and run it.
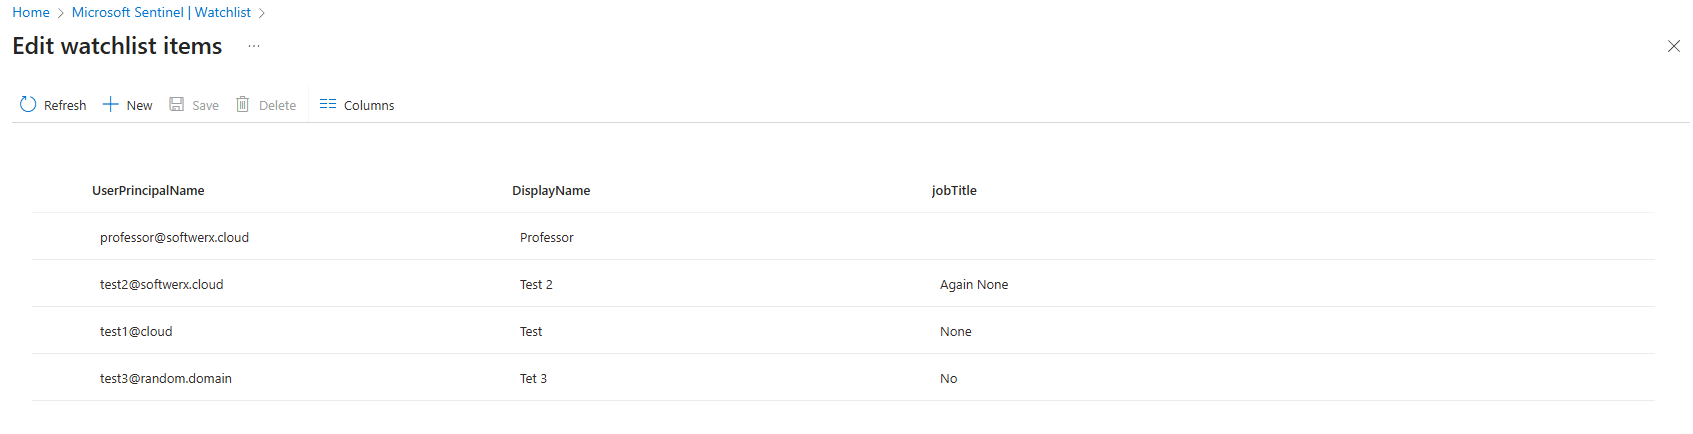
- To Test: I have a VIP member in Entra ID
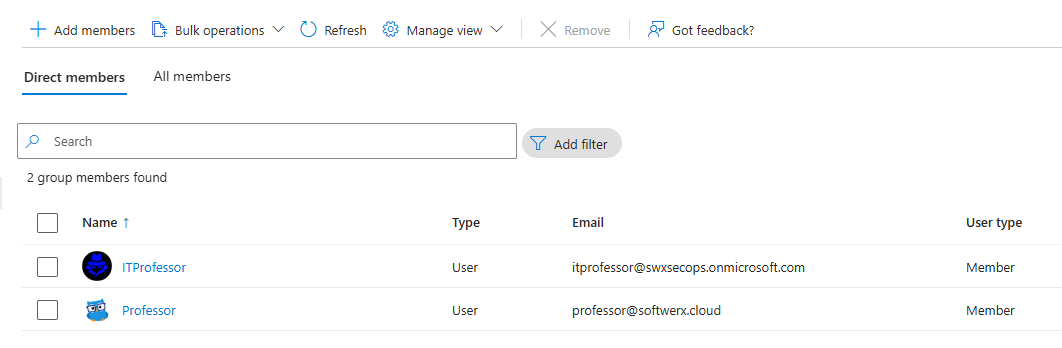
One of them is missing from my current Watchlist, and I have a few users that I want to remove from the Watchlist that are not currently in my Entra ID group
- The Test: Go to your Entra ID "VIPs" group and add a new user. Run the Logic App. Go to your Sentinel watchlist. A few moments later, boom. The new user appears automatically.
Let's run the Logic App.
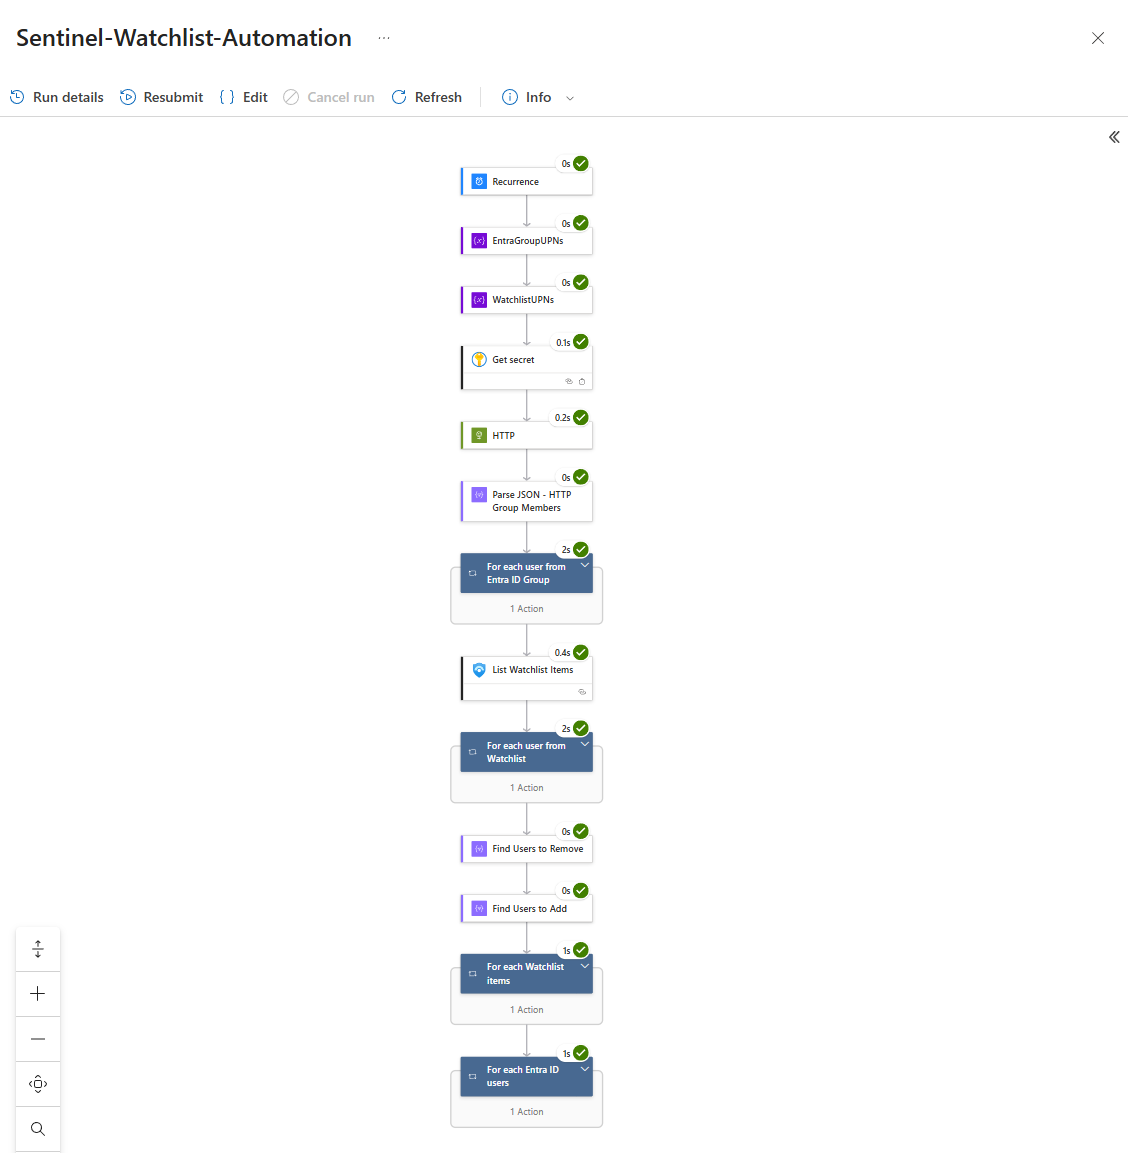
Watchlist has been automagically updated
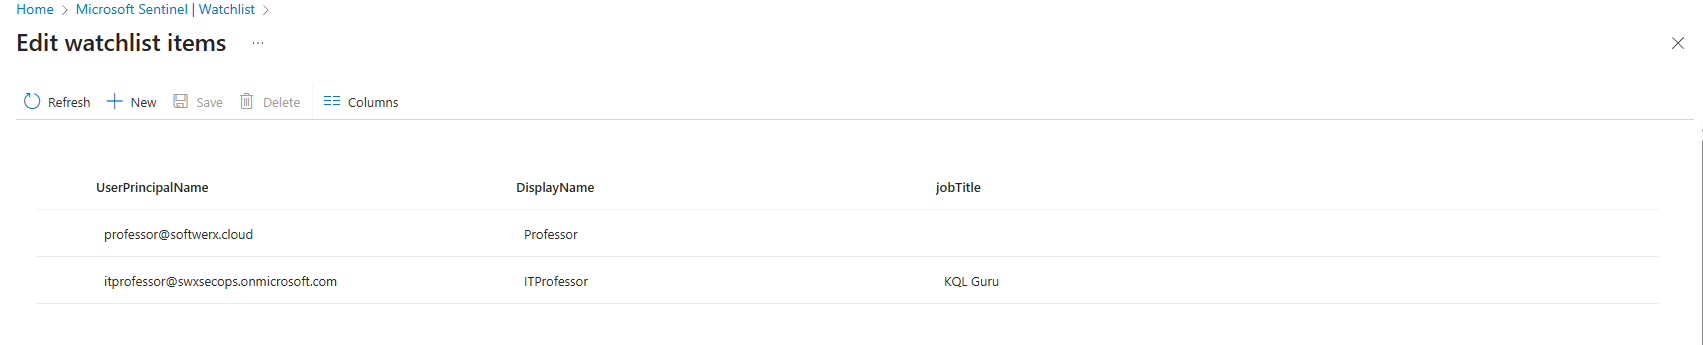
You've done it. You have built a truly automated, self-healing system. Your VIP watchlist is now guaranteed to be in perfect sync with your source of truth in Entra ID. You've eliminated a manual, error-prone task and made your most critical detections more reliable than ever.
Stand proud.
Class dismissed.