The "Undo" Button for Sentinel Logs: An In-Depth Guide to Purging Data

Alright, class.
Let's talk about the "I have made a terrible, expensive mistake" moment.
You just onboarded a new data source. You thought you configured the agent correctly. You go to bed feeling proud. You wake up the next morning to find it has dumped 800GB of verbose, multi-line debug logs into your most expensive SecurityEvent table. Your Azure bill has spiked unexpectedly due to this misconfiguration.
Or maybe a developer accidentally logged customer PII (Personally Identifiable Information) into a table, or because you are working in MSSP, you transferred a client's data to the wrong Sentinel instance, and now your compliance officer is breathing down your neck.
You need to get rid of that specific, toxic data without nuking the entire table. You need an "undo" button.
Welcome, class, to the Log Analytics Workspace Purge API. This is your scalpel for performing data surgery. It's a powerful tool, and like any scalpel, you need to be very, very careful with it.
The Ground Rules: Before You Purge
This isn't a toy. Purging is a permanent, destructive action. There is no "un-purge" button. You're digitally shredding the data.
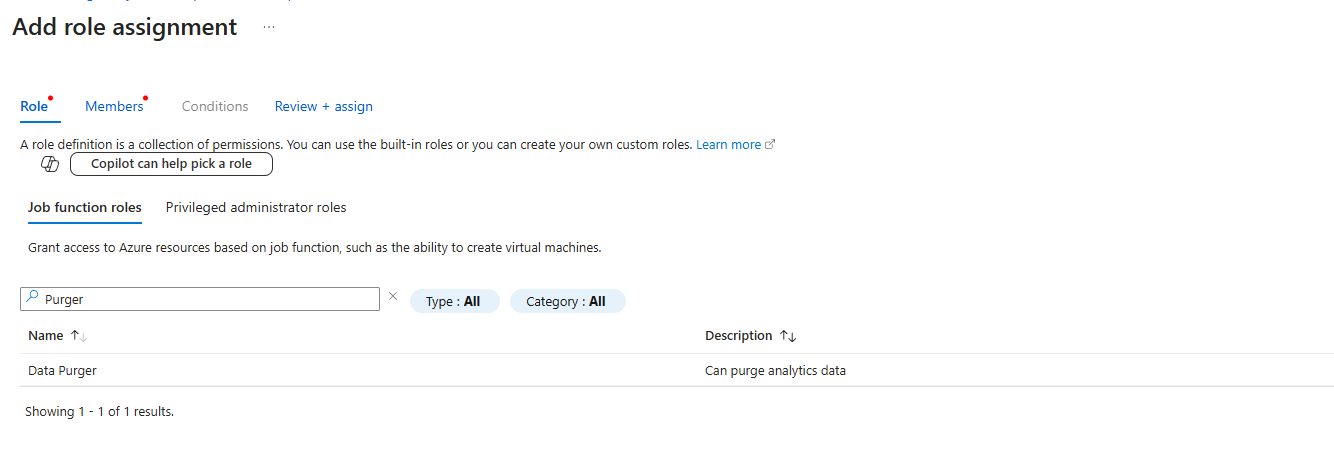
- The Prerequisite: You can't just walk in and start deleting things. You need the Data Purger role assigned to your account on the Log Analytics Workspace. This is a special, high-privilege role for a reason. Go to your workspace, click on Access control (IAM), and make sure you assign it.
- The Caveat: Microsoft says a purge can take up to 30 days to complete. In my experience, for most reasonable requests, it's usually done within a couple of hours. But you are at the mercy of the Azure backend. Don't promise your boss it will be done in five minutes.
The Mission: Purging a Noisy Machine
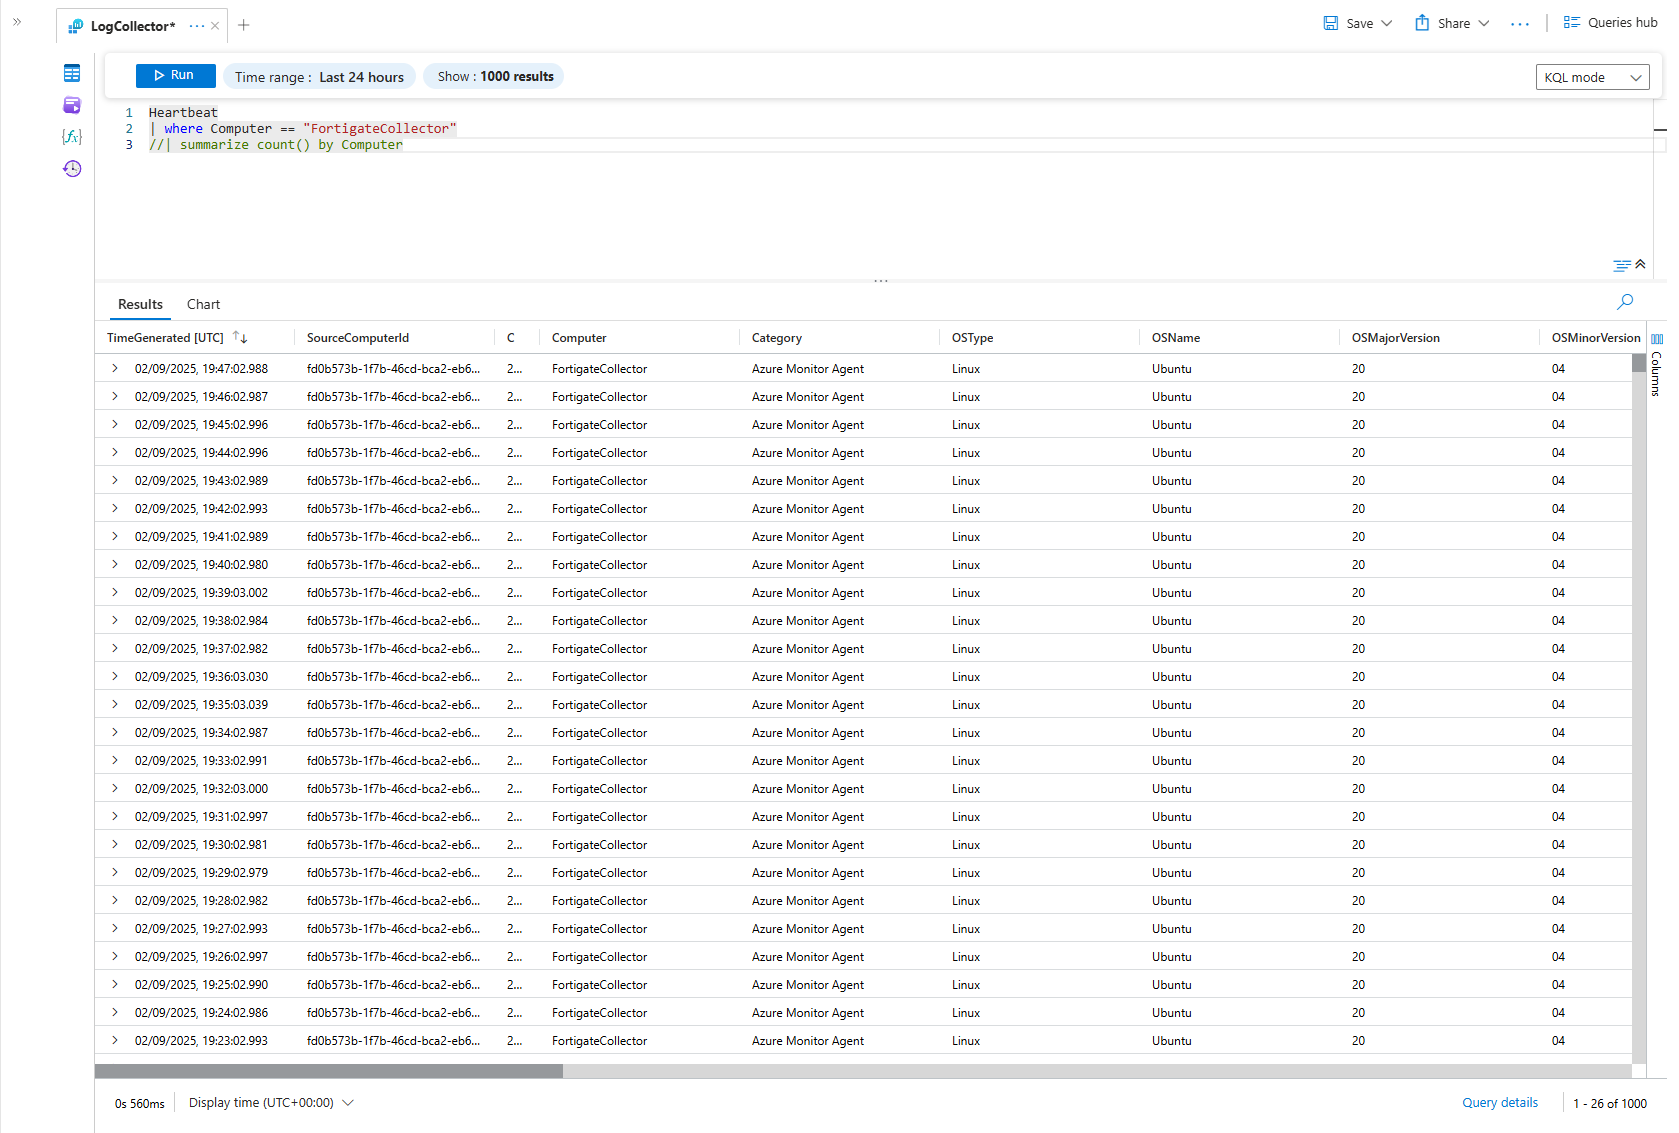
Let's use a real-world scenario. You have a test machine named FortigateCollector that was accidentally configured to send Heartbeat logs. It's not a production machine, and its data is just cluttering your table and creating noise in your logs. We want to remove only the heartbeat logs from this one specific machine.
We're going to talk directly to the Azure API to do this. Don't worry, it's easier than it sounds.
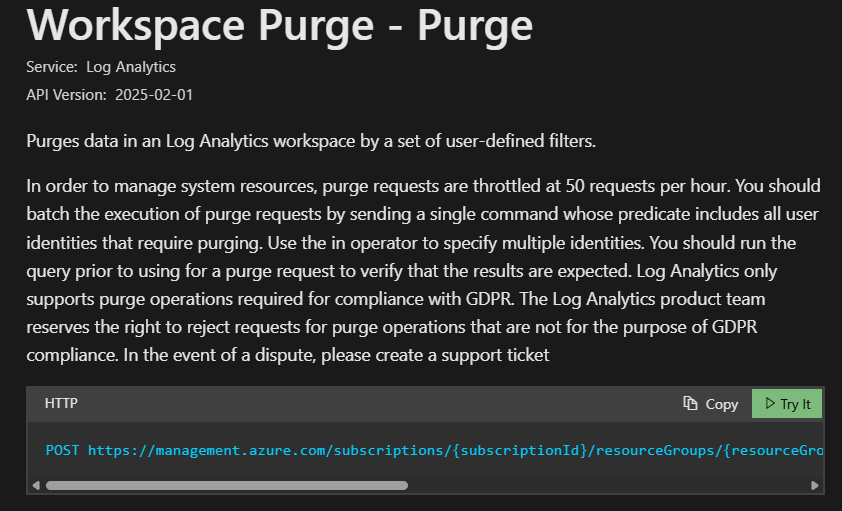
- Navigate to the official Microsoft documentation for the Workspace Purge API.
- You'll see a green Try it button. This is our magic portal. It lets us talk to the API without writing any code. Click it.
- Sign In: You'll be prompted to sign in with your Azure account. Use the one that has the
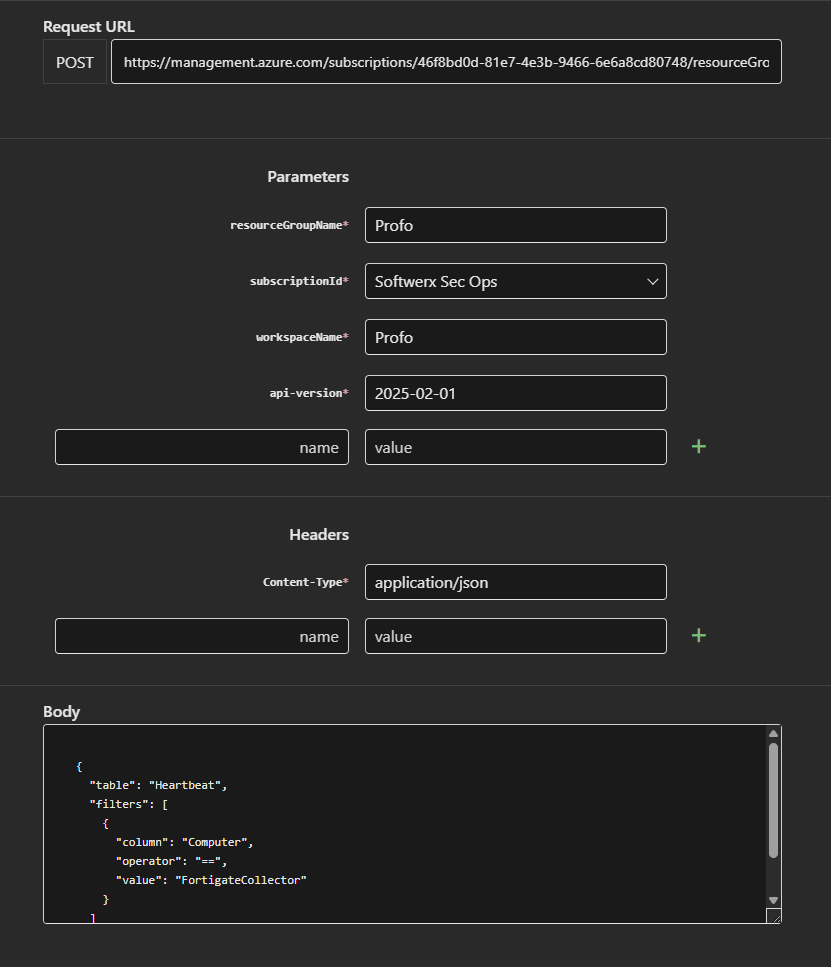
Data Purgerrole. - Fill in the Blanks: The portal will now show you the API request. You just need to fill in the parameters for your environment:
subscriptionIdresourceGroupNameworkspaceNameapi-version(This is usually auto-populated. Leave it alone.)
Construct the Body: This is where you give the API its instructions. You need to tell it exactly what table to look in and what data to delete. In the Body section, you'll write a small piece of JSON
{
  "table": "Heartbeat",
  "filters": [
    {
      "column": "Computer",
      "operator": "==",
      "value": "FortigateCollector"
    }
  ]
}
Professor's Breakdown: The Purge filters
That little filters block is incredibly powerful. Let's break it down:
"column": The name of the column in the table you want to filter on. Simple."operator": The logic you want to use. This works just like KQL! You can use==(equals),in(is in this list),>(greater than),<(less than),between, and even~=(contains string)."value": The data you're looking for. It can be a string like our computer name, a number ("value": 100), a timestamp ("value": "2025-09-01"), or even an array of values if you're using theinoperator.
You could get very specific. For example, to delete all SecurityEvent logs for Event ID 4624 (An account was successfully logged on) from a specific machine, your filter would look like this:
{
"table": "SecurityEvent",
"filters": [
{
"column": "EventID",
"operator": "==",
"value": 4624
},
{
"column": "Computer",
"operator": "==",
"value": "NoisyServer01"
}
]
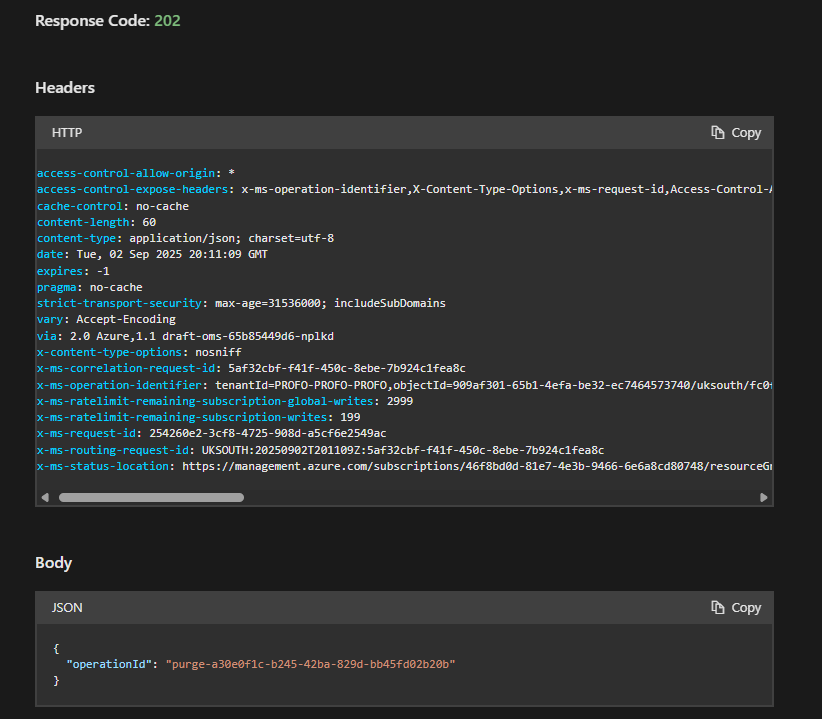
}Okay, back to our mission. Once you've filled everything out, click the blue Run button at the bottom of the blade.
If everything is correct, you'll get a 202 Accepted response. This doesn't mean the purge is done. It means Azure has accepted your request and put it in the queue. You'll get an operationiD in the response body. This is your ticket number.
Checking the Status: "Are We There Yet?"
So, how do you know when the job is done? You have two good options.
Option 1: The API Way (Ask Your Ticket Number)
- Go to the documentation for the Get Purge Status API.
- Click Try it.
- Fill in your
subscriptionId,resourceGroupName, andworkspaceName. - Crucially, paste the
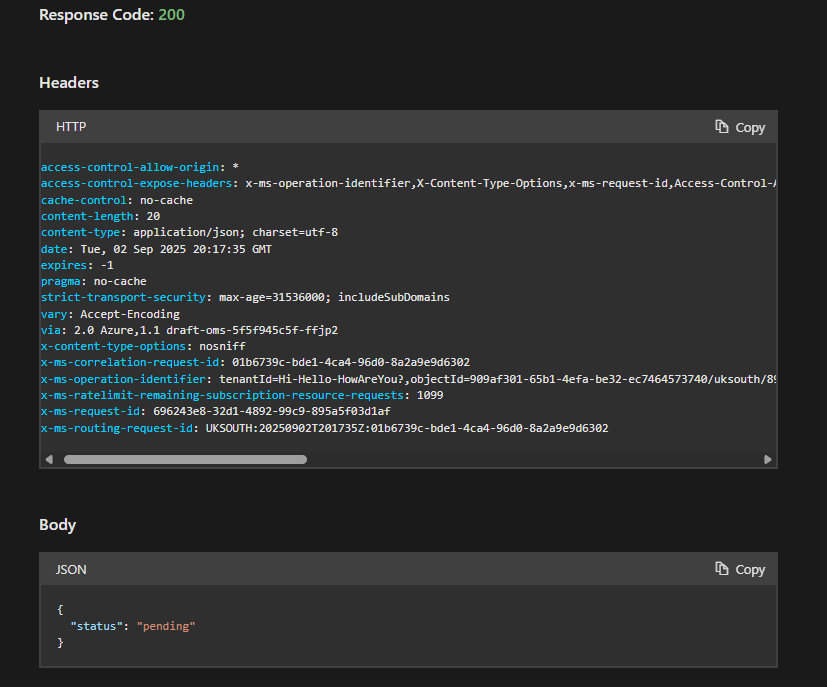
purgeId(theoperationiDyou got earlier) into thebodyfield. - Click Run. The response will tell you the status, which will be
pendingorcompleted.
Option 2: The Portal Way (The Health Tab)
This is often easier.
- In the Azure Portal, go to your Monitor
- On the left menu, click on the Log Analytics Workspaces tab (under Insights).
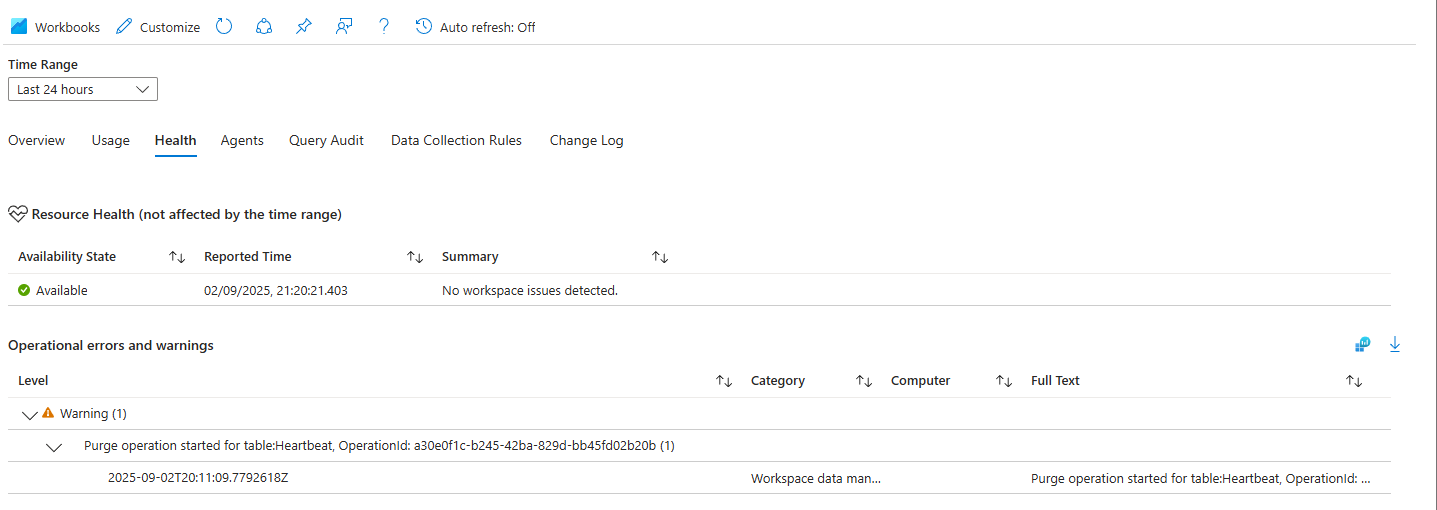
- Select appropriate LAW and click on the Health tab
- This page shows the status of ongoing operations, including purges. You'll see your purge operation listed here and can track its progress.
A Note on Automation
For my fellow automation fanatics, yes, you can absolutely do this with a Logic App. You'd use the HTTP connector to make the same API calls we just did manually. You could build a playbook that, for example, takes a computer name as input and automatically generates and submits the purge request. Just make sure the Logic App's Managed Identity has been granted the Data Purger role!

And that, class, is how you perform data surgery. It's a tool you hope you'll never need, but when you do, knowing how to use it correctly can save you from a very expensive or very embarrassing situation.
Class dismissed.